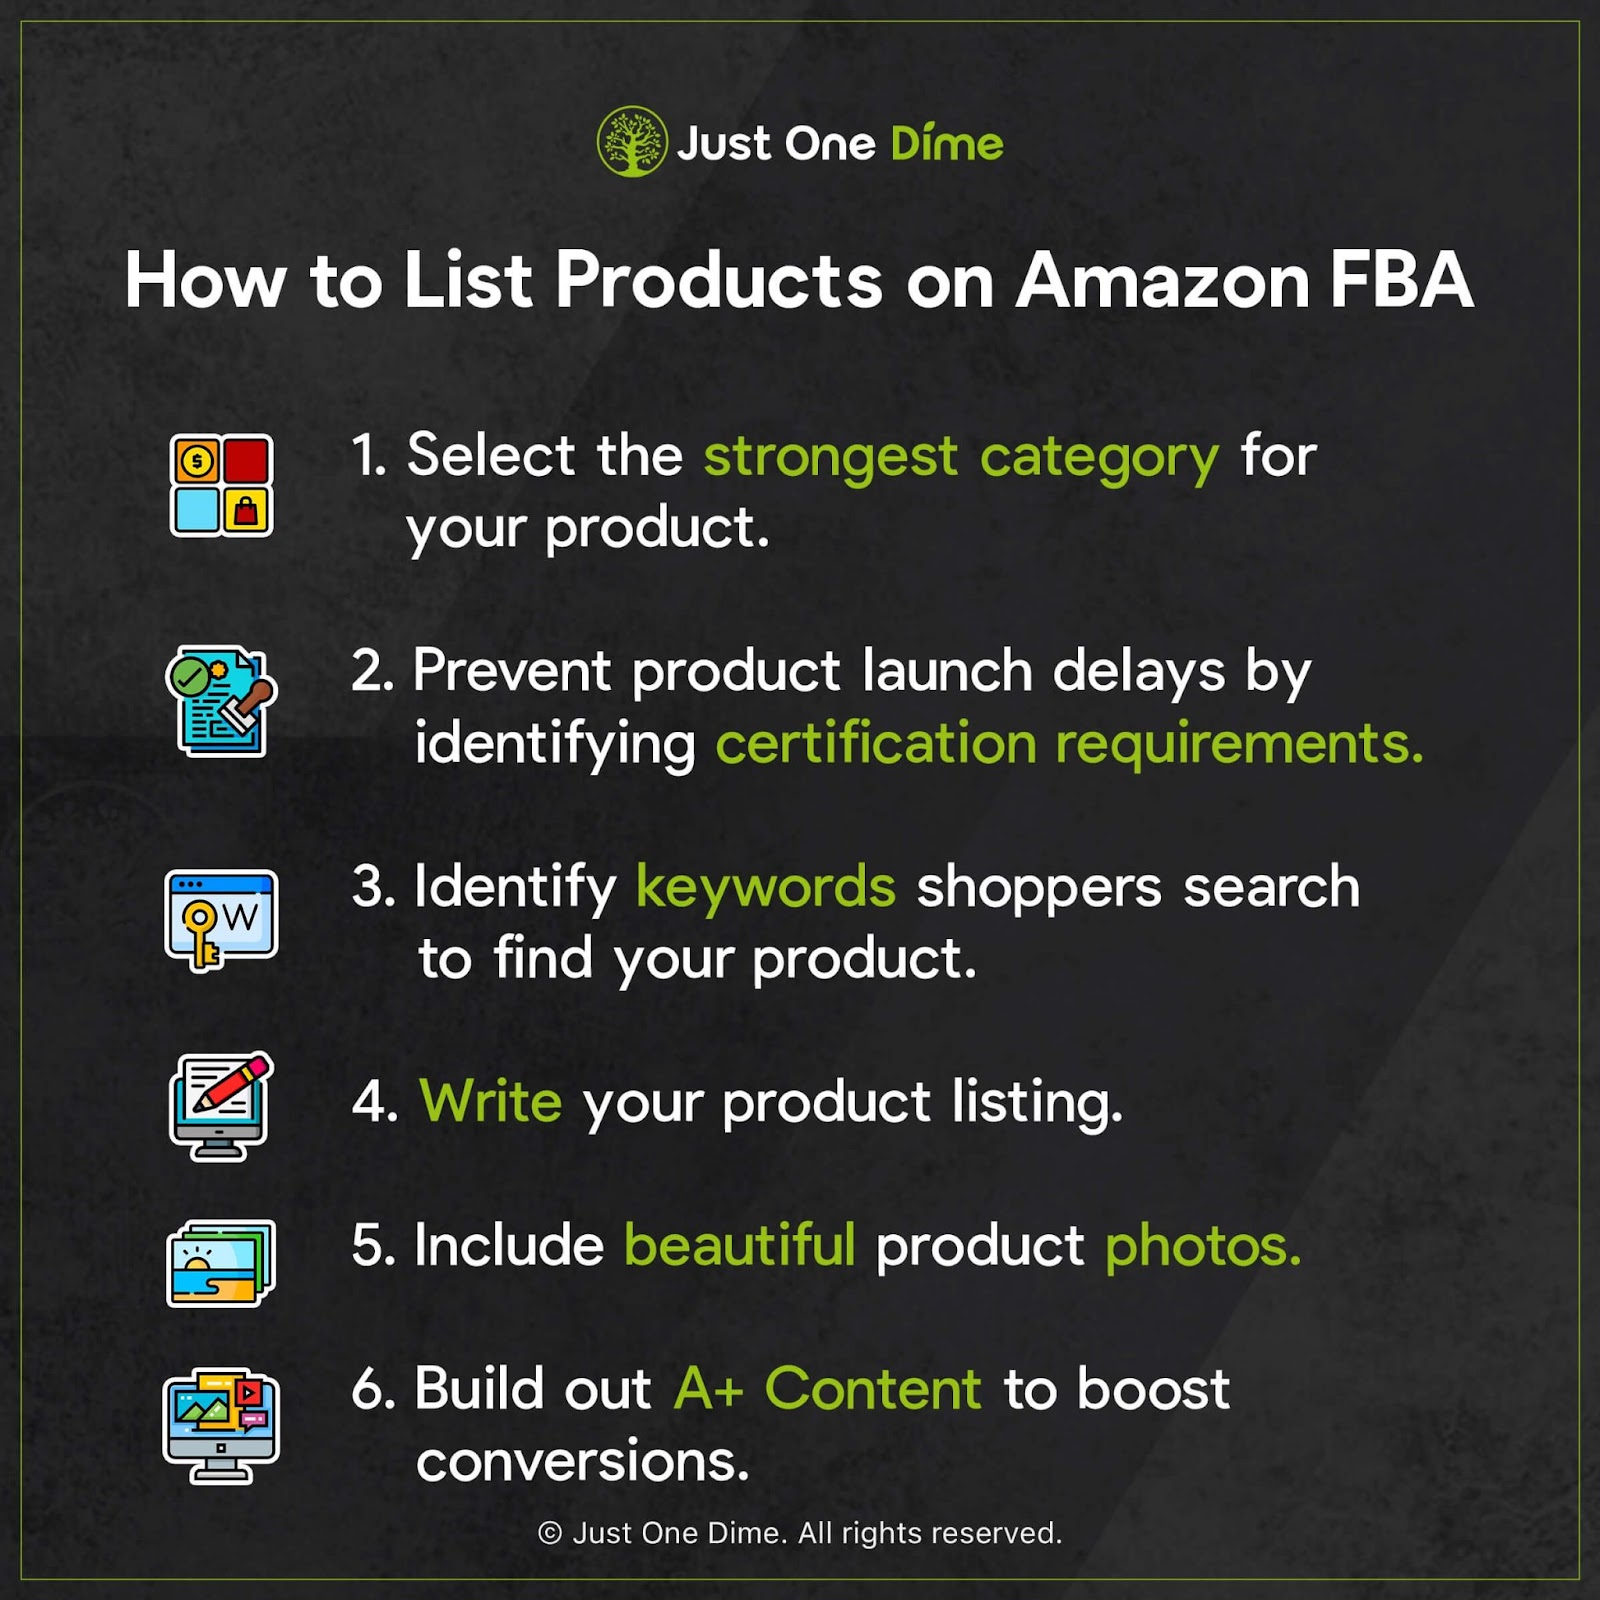
Today, I’m going to give you six steps to create a stunning product listing that drives conversions 📈.
I’ve been selling on Amazon since 2014. In that time, I’ve created, tweaked, and overhauled dozens of product listings. I’ve been through trial by fire, and am bringing this lesson to you today so that you don’t have to walk through the process blindly.
The process I’m about to show you is just to get you started: You will 100% have to adjust your own listing based on data, which I will show you how to do here.
1) Select the strongest category for your product.
Amazon product categories work like trees 🌳. You choose the main category your product broadly fits into, the tree trunk—for example Pet Supplies—and then work your way through to smaller branches, and even leaves—such as Dogs > Toys—within that broad category. It may take you several steps to land in the specific subcategory you will ultimately sell your product from.
Because there are so many different options within each broad category, there are oftentimes multiple subcategories your products could make sense to sell in. It’s important that you pick the right one.
Choosing the right category for your Amazon product is twofold: You want to choose the category that will best help shoppers find your product, but you also want to choose a specific subcategory that is not overly saturated with competitors.
If you can choose a subcategory less popular with Amazon sellers, but still popular for shoppers, you will have an easier time selling your products because you will face less competition.
With fewer sellers to compete against, your products will be more often selected by customers shopping within that specific niche. This can allow you to dominate your market.
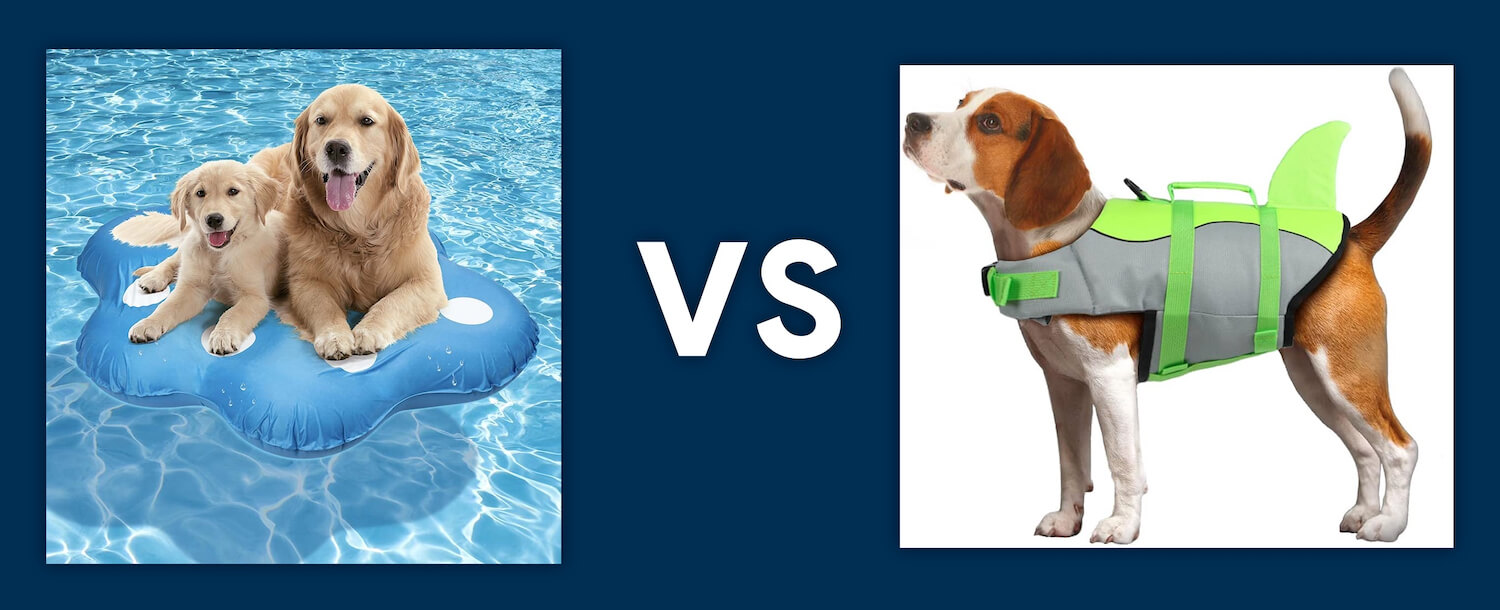
Let’s say, for example, that you sell “dog floats” for pools, lakes, and such. When you add your product to Amazon, you have two strong options to list that product:
“Pet Supplies > Dogs > Toys”
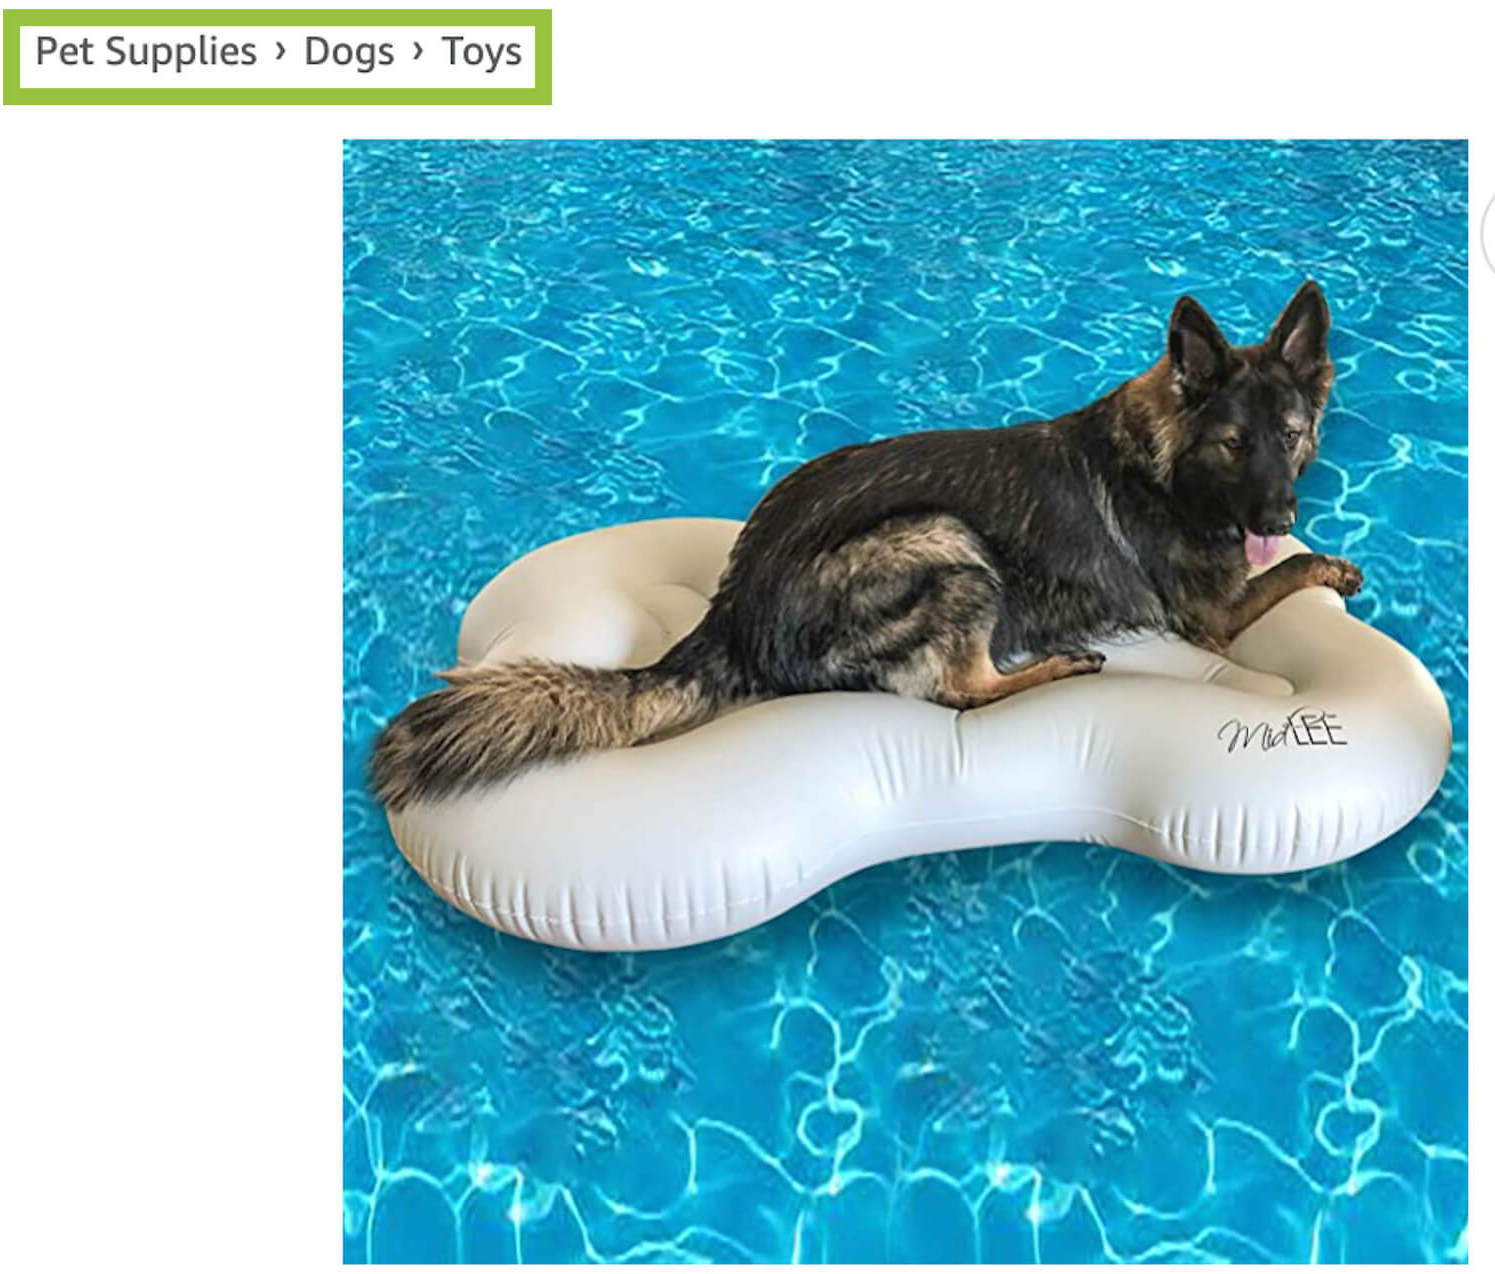
This option zeroes in on the fact that the floatie is for dogs, not just a general raft decorated in paw prints.
You might also elect to categorize in “Toys & Games > Sports & Outdoor Play > Pools & Water Toys > Pool Rafts & Inflatable Ride-Ons”.
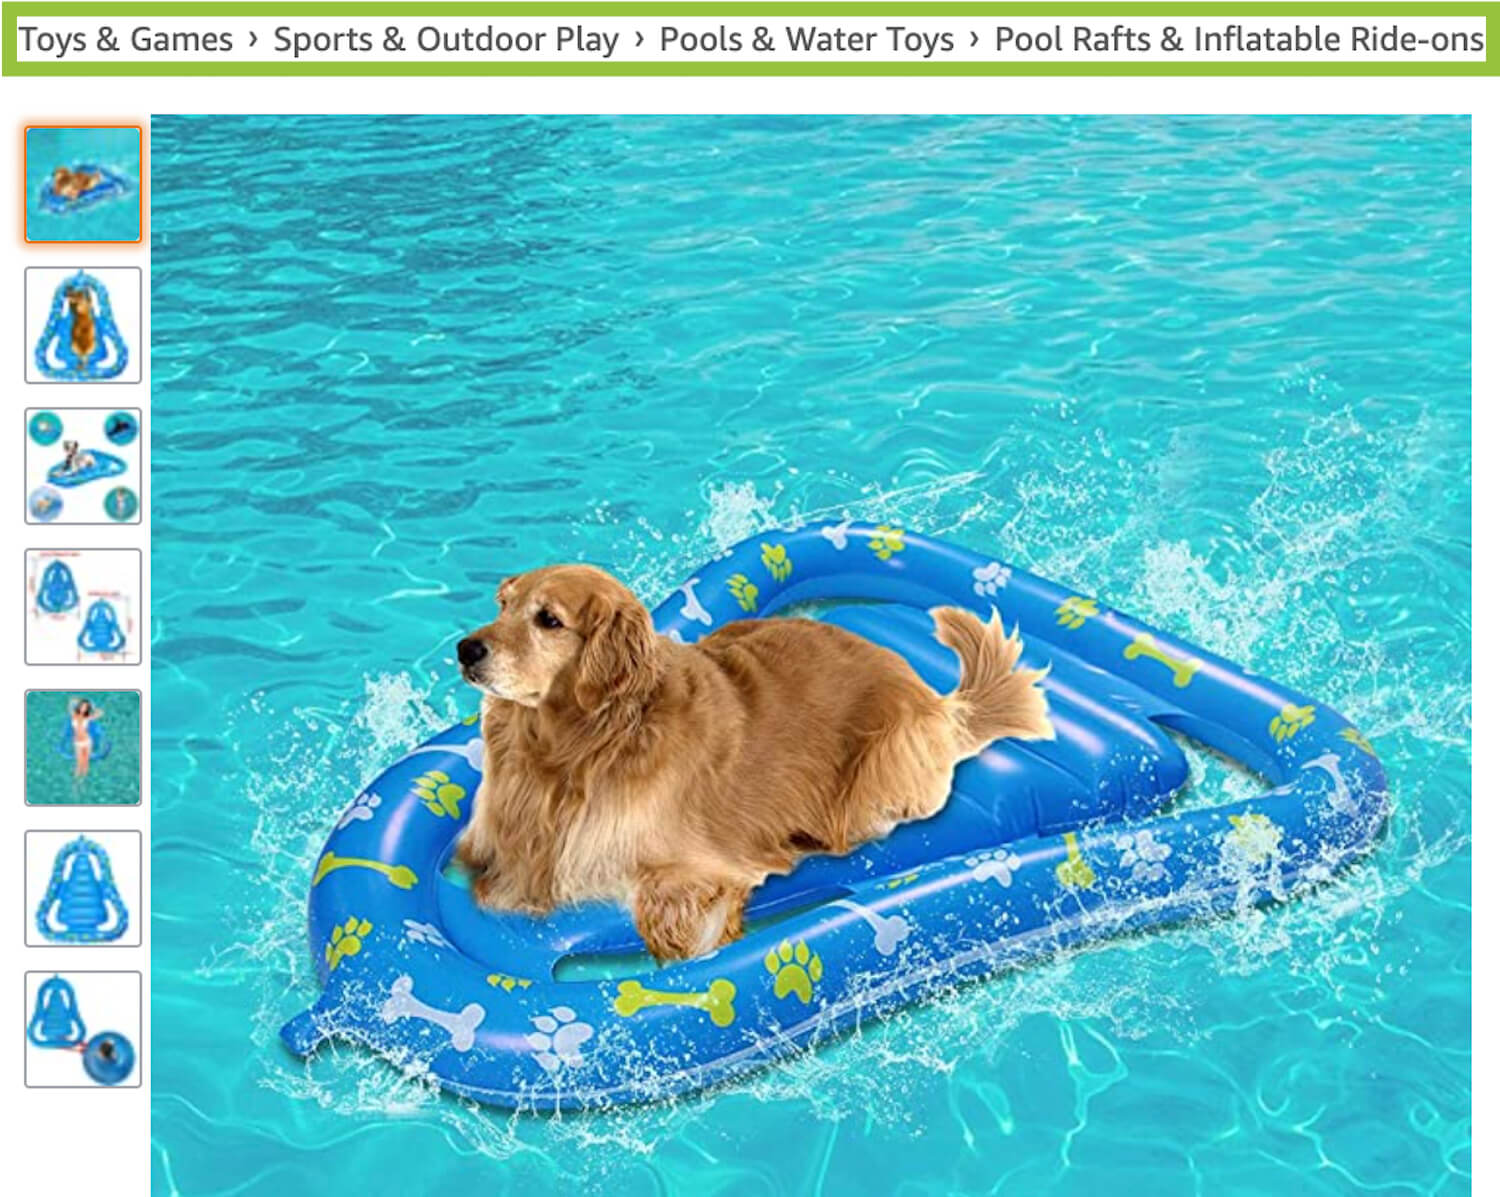
This option positions your product more as a general water toy and less of a pet product.
I’ve even found this same product listed, oddly enough, in the sub-niche “Pet Supplies > Dogs > Apparel & Accessories > Shirts” 🤷:
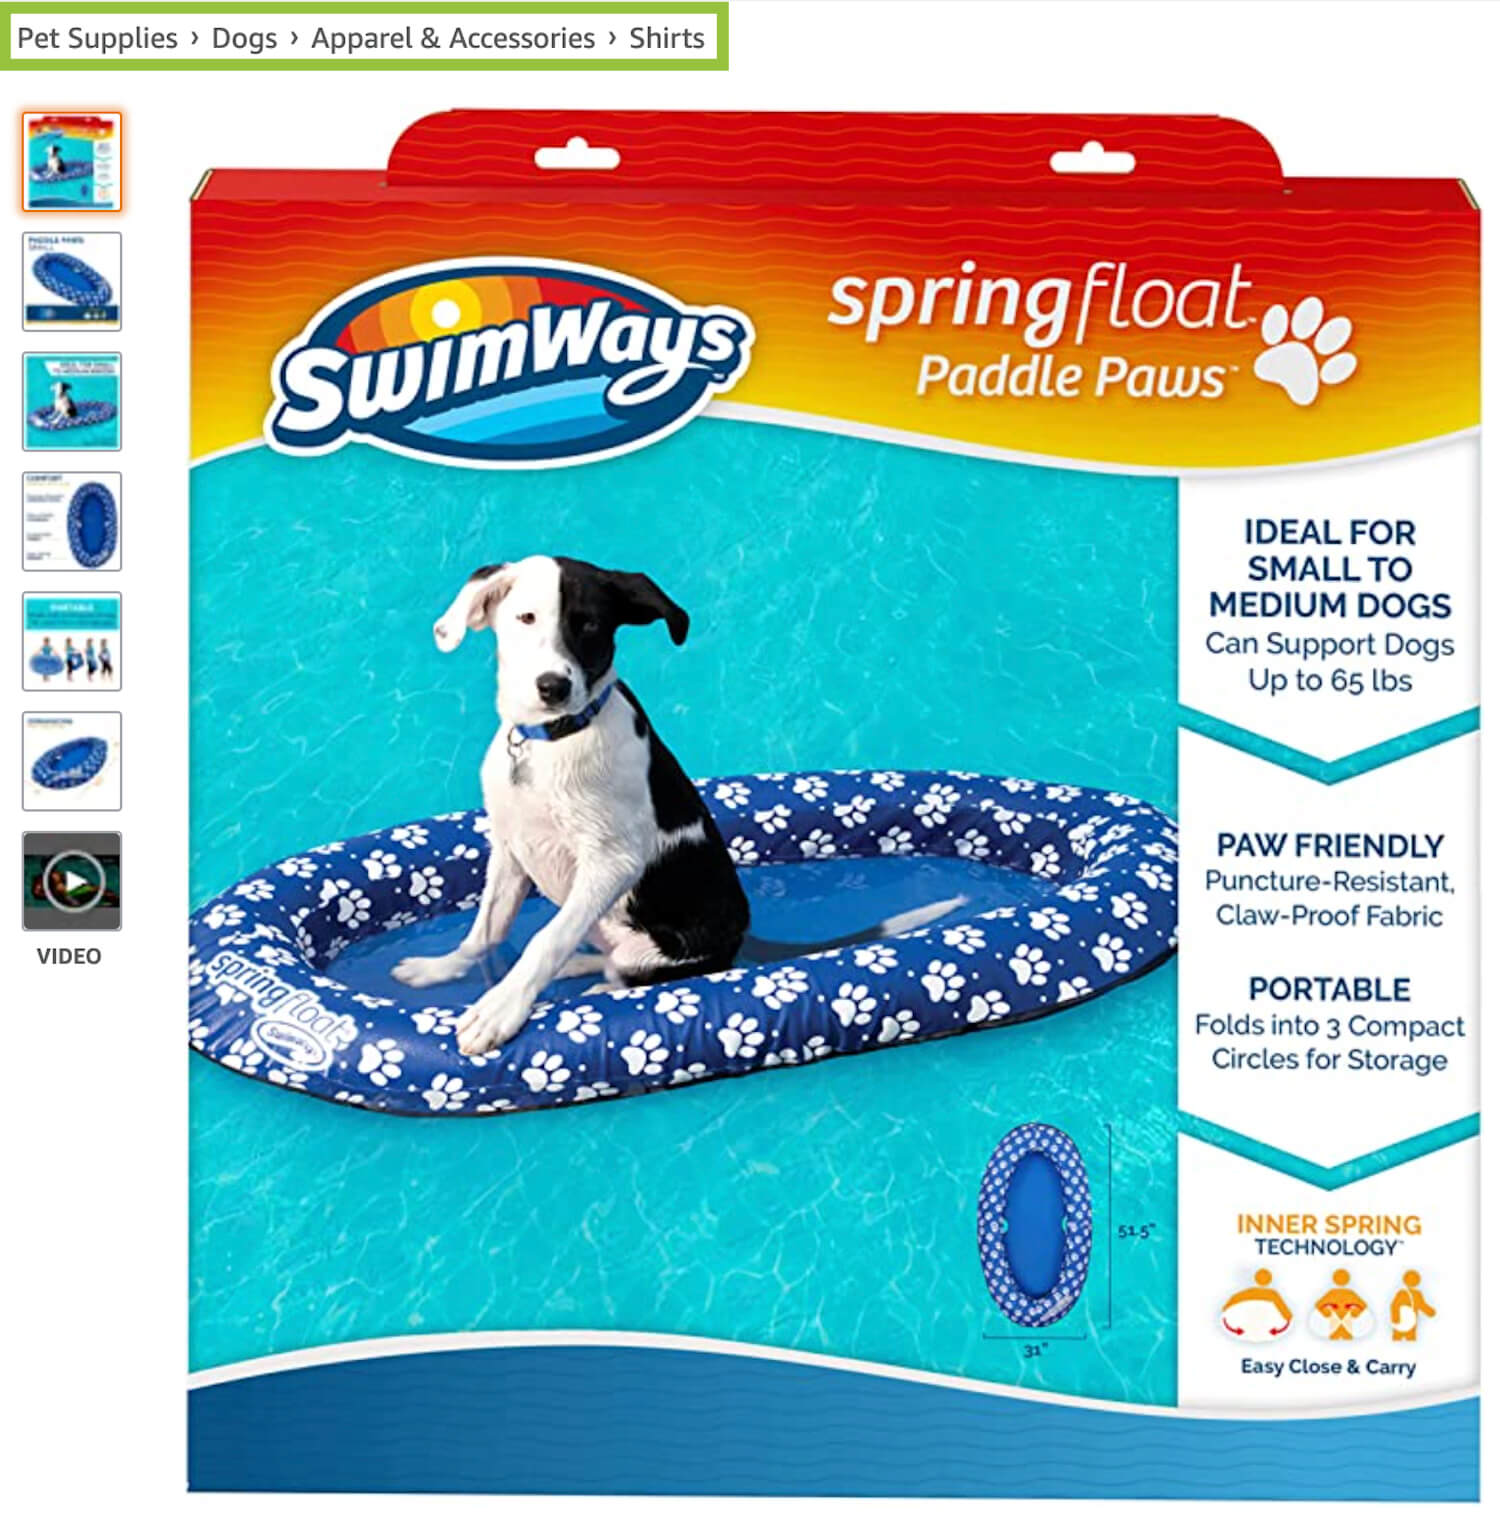
Note that I don’t recommend miscategorizing your product like the above example. Always choose the best subcategory for your product—not the most sneaky 🥷.
However, which niche you ultimately choose to list your product in depends on how you want to angle your product to customers.
Of course, since making sales is your main goal, you should always aim to place your product where shoppers who want that type of product will easily find it.
For your dog water floatie, for instance, it would not be in your best interest to list that product under the classification “Home & Kitchen > Furniture > Bedroom Furniture > Mattresses & Box Springs > Waterbed Mattresses”...regardless of how little competition exists in that subcategory for dog floaties.
You should examine competitors’ products to find what sub-niches might best suit your product (and help customers to find it). Then, to add your product to your chosen category…
Login into your Amazon seller central account.
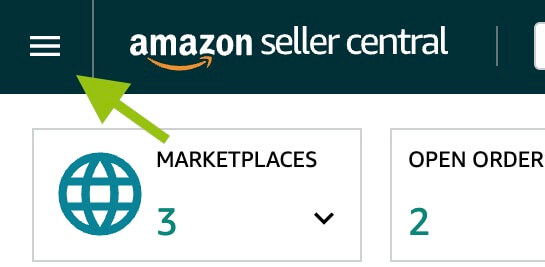
Click on the three horizontal lines in the top left corner.
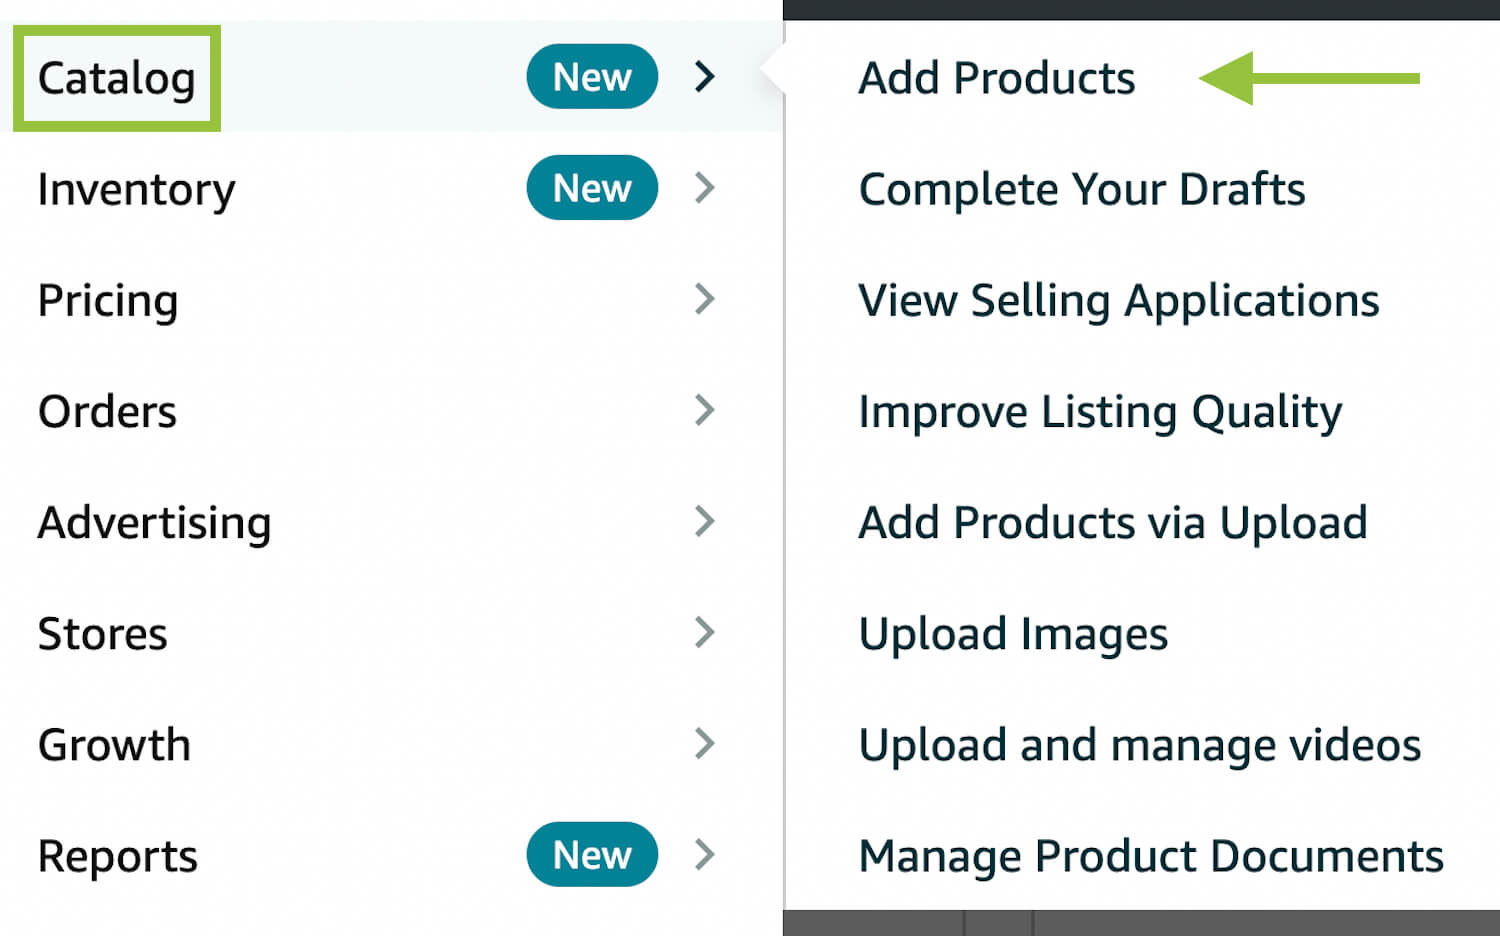
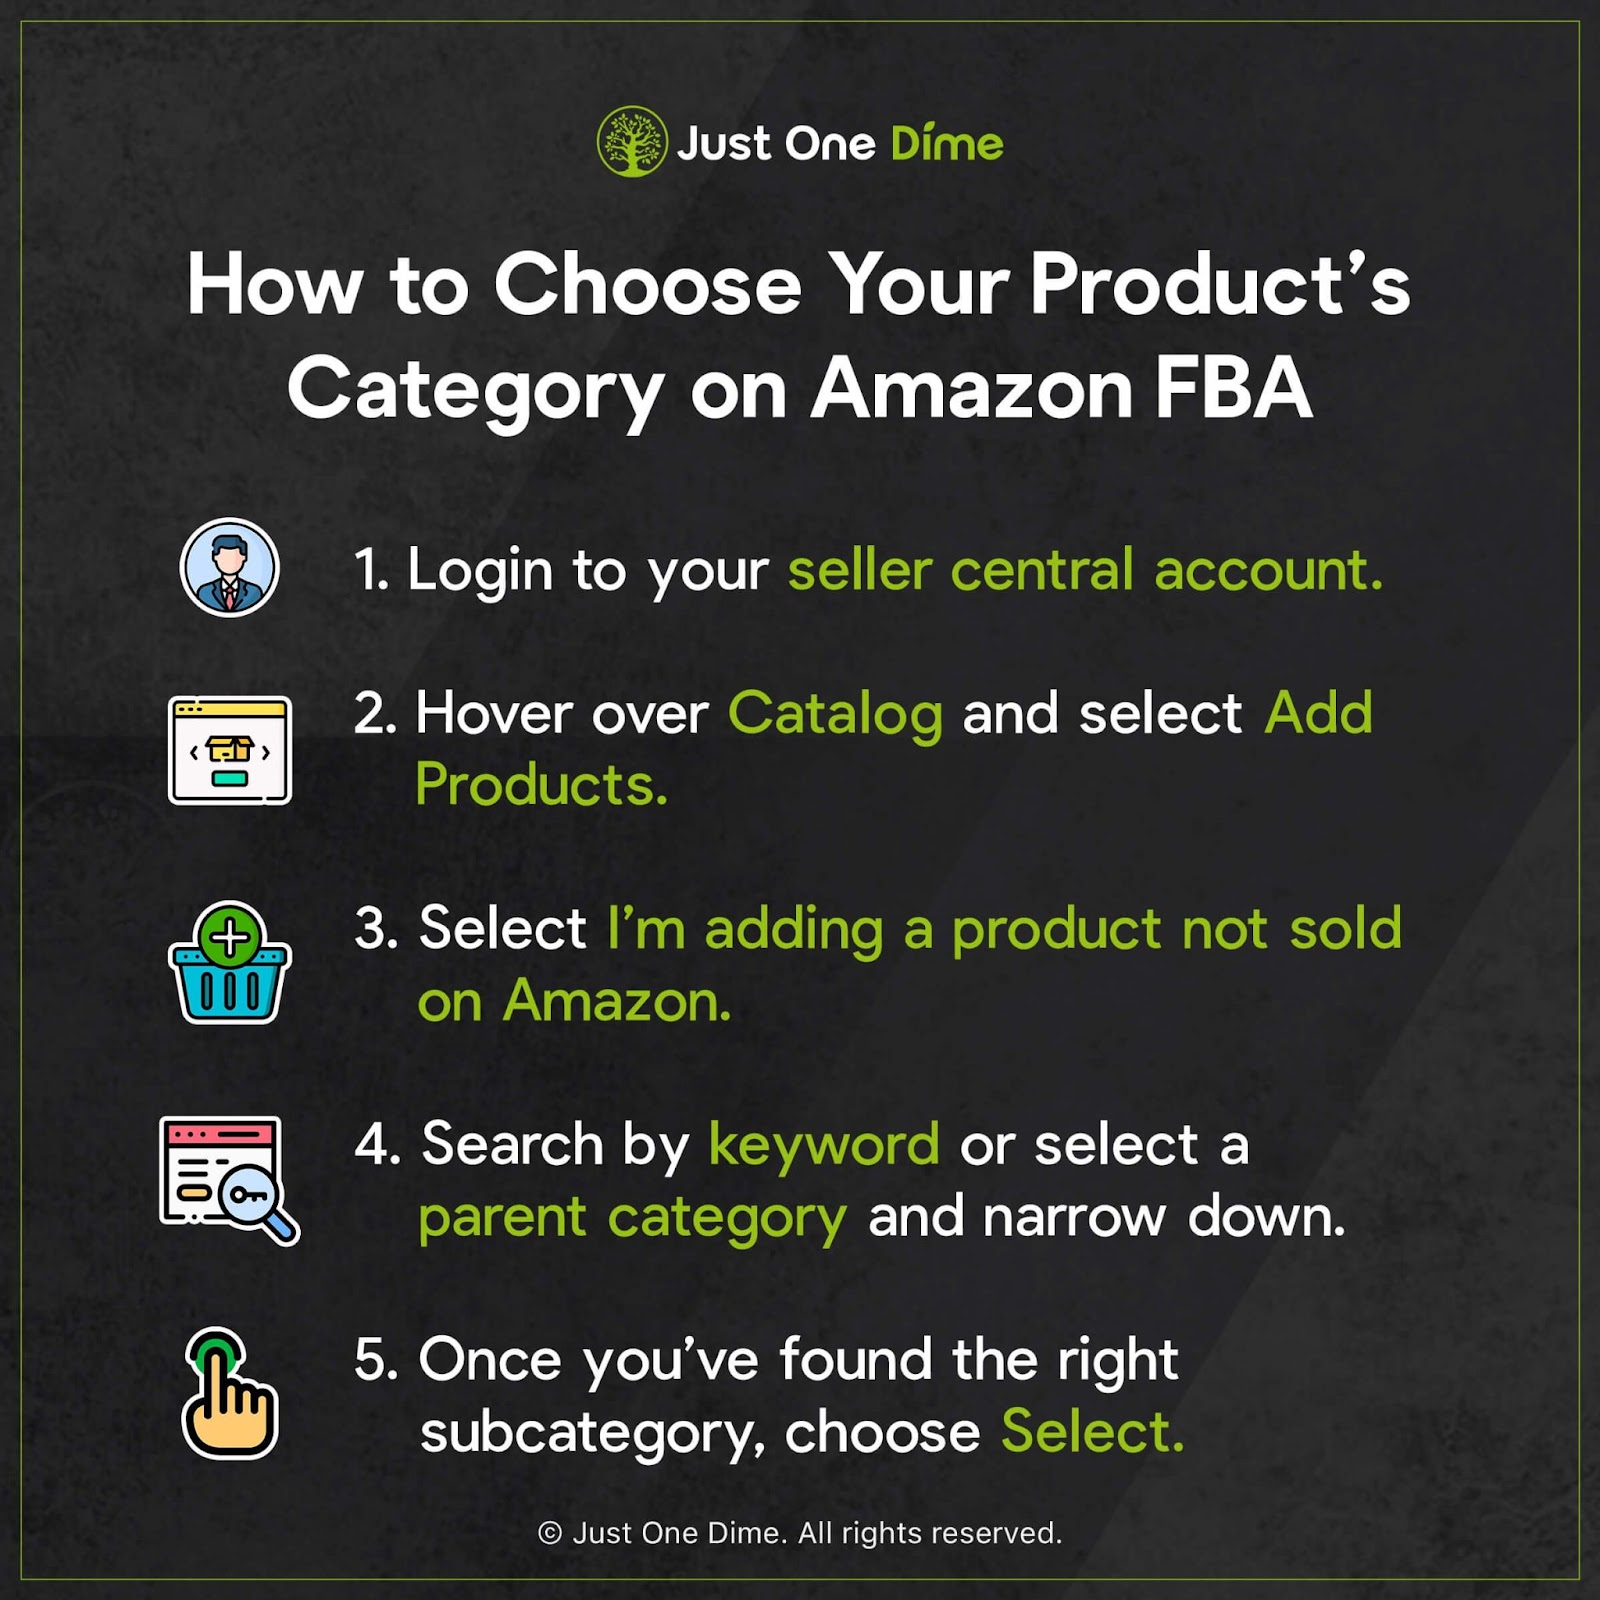
Hover over Catalog and select Add Products.
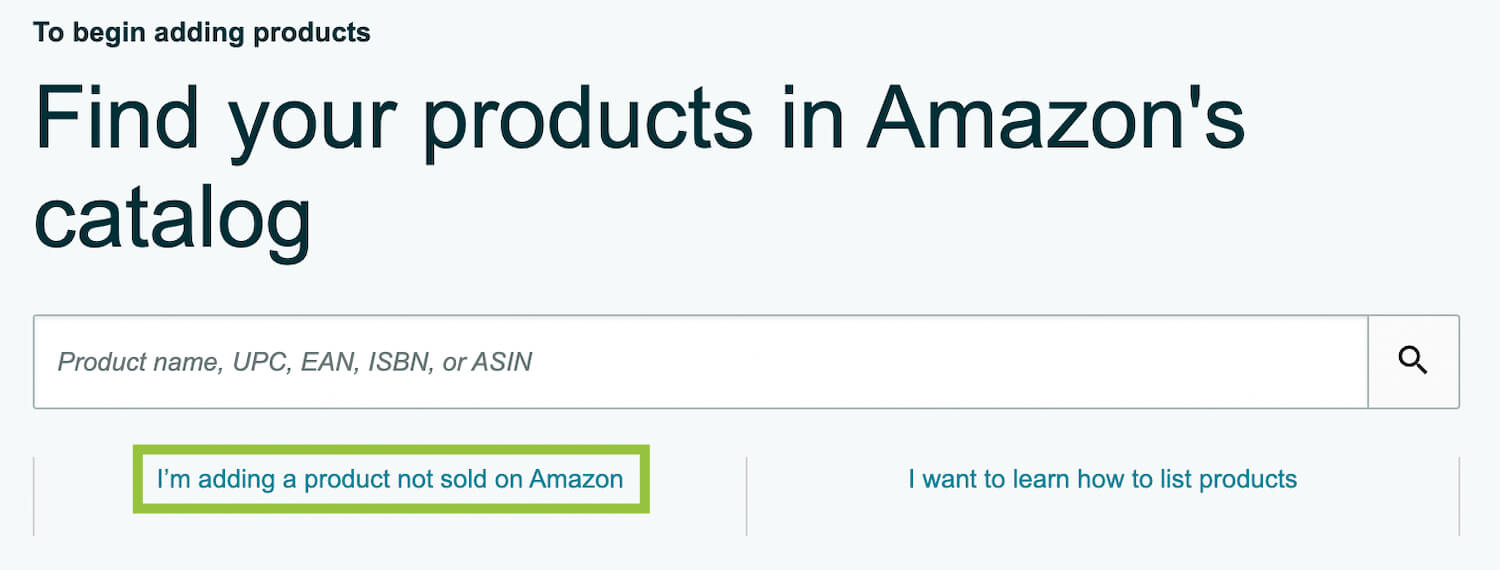
Click I’m adding a product not sold on Amazon.
There are two ways to select your product’s category:
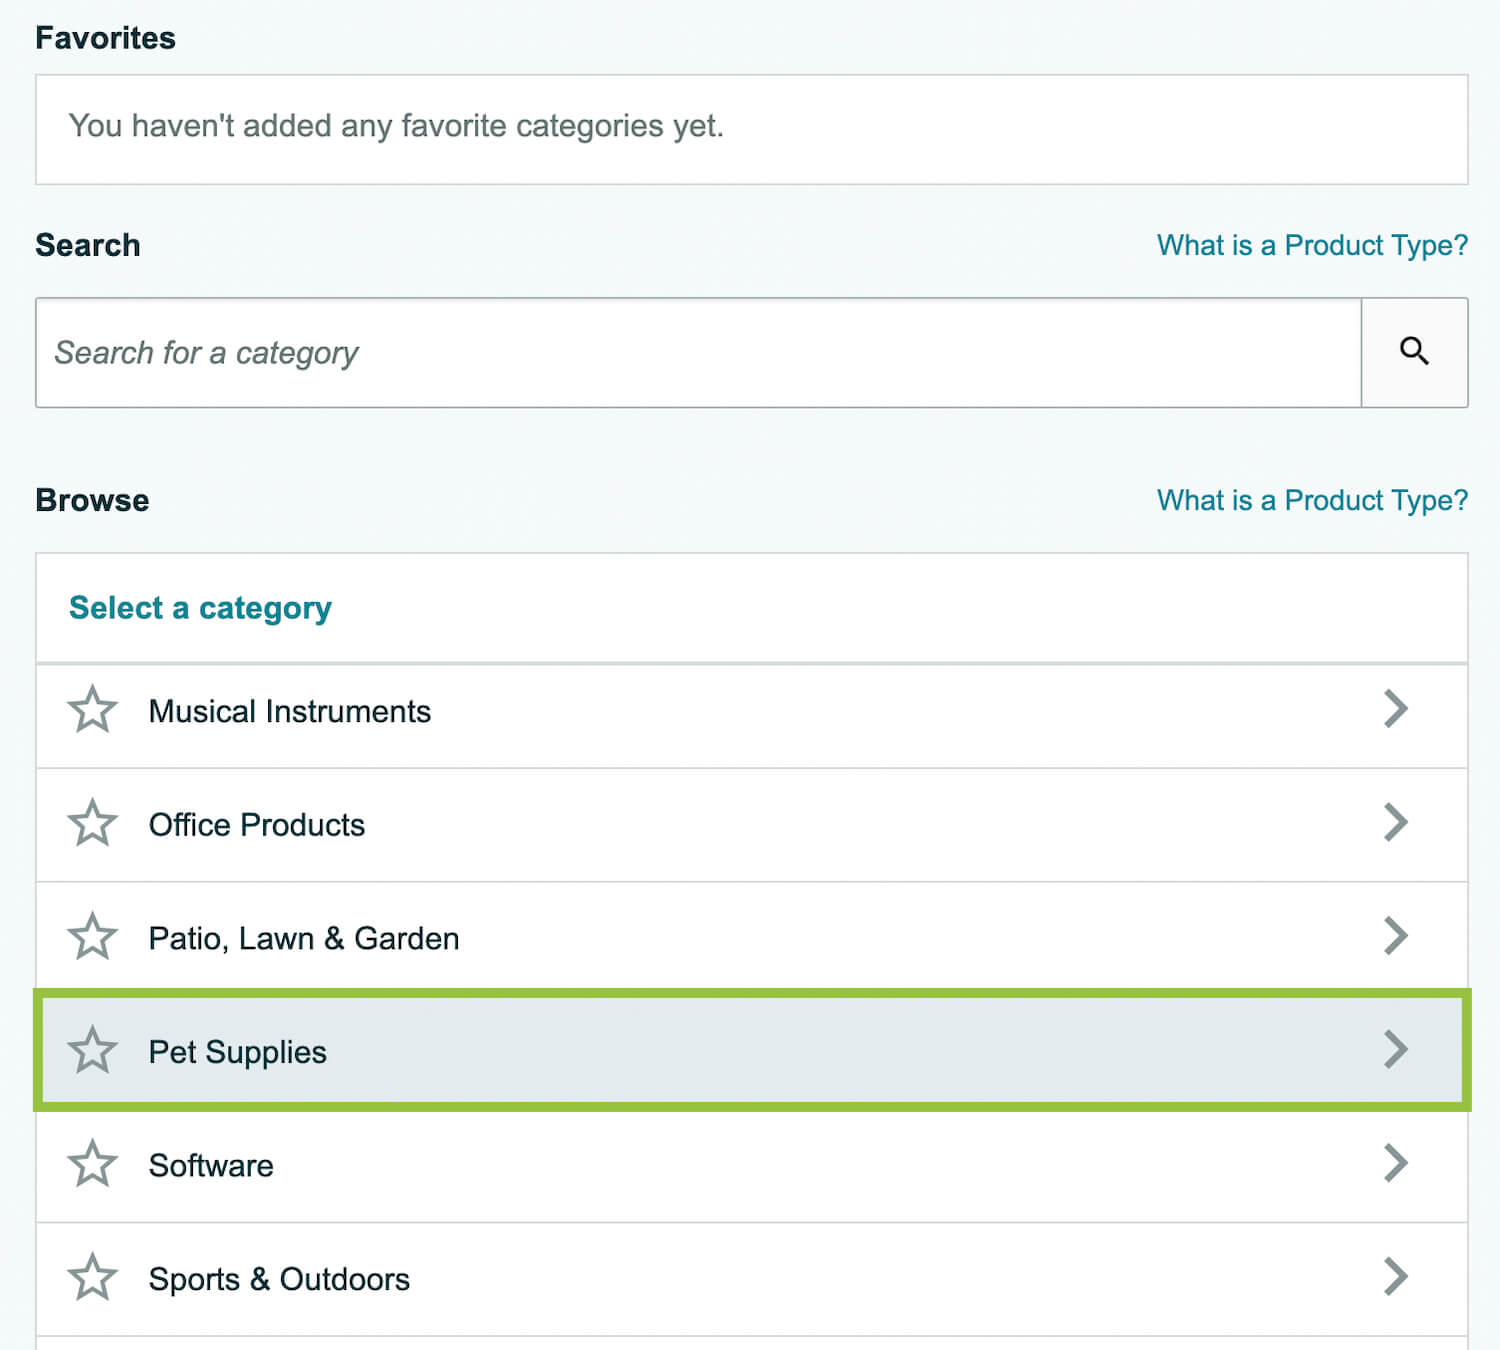
You can select by dropdowns. First select your product’s overarching, parent category (the tree trunk).
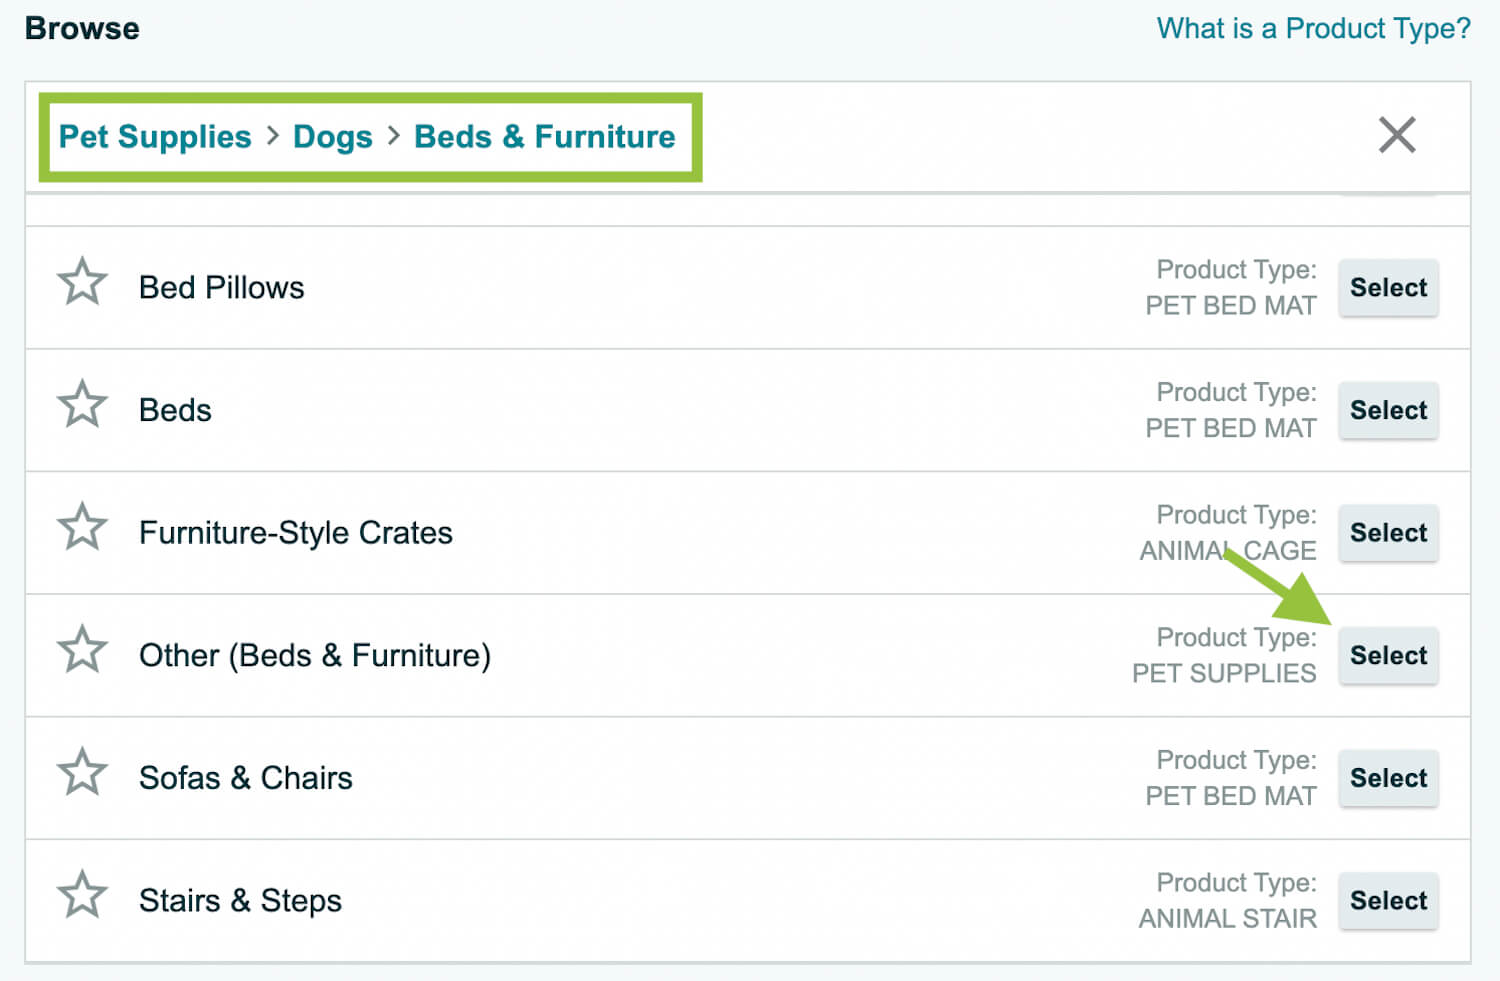
Next, continuously select narrower and narrower categories until you arrive at the desired, final child (or leaf) category. Click Select.
Additionally, this method will show you, with a lock icon, if you are gated from any product (sub)categories.
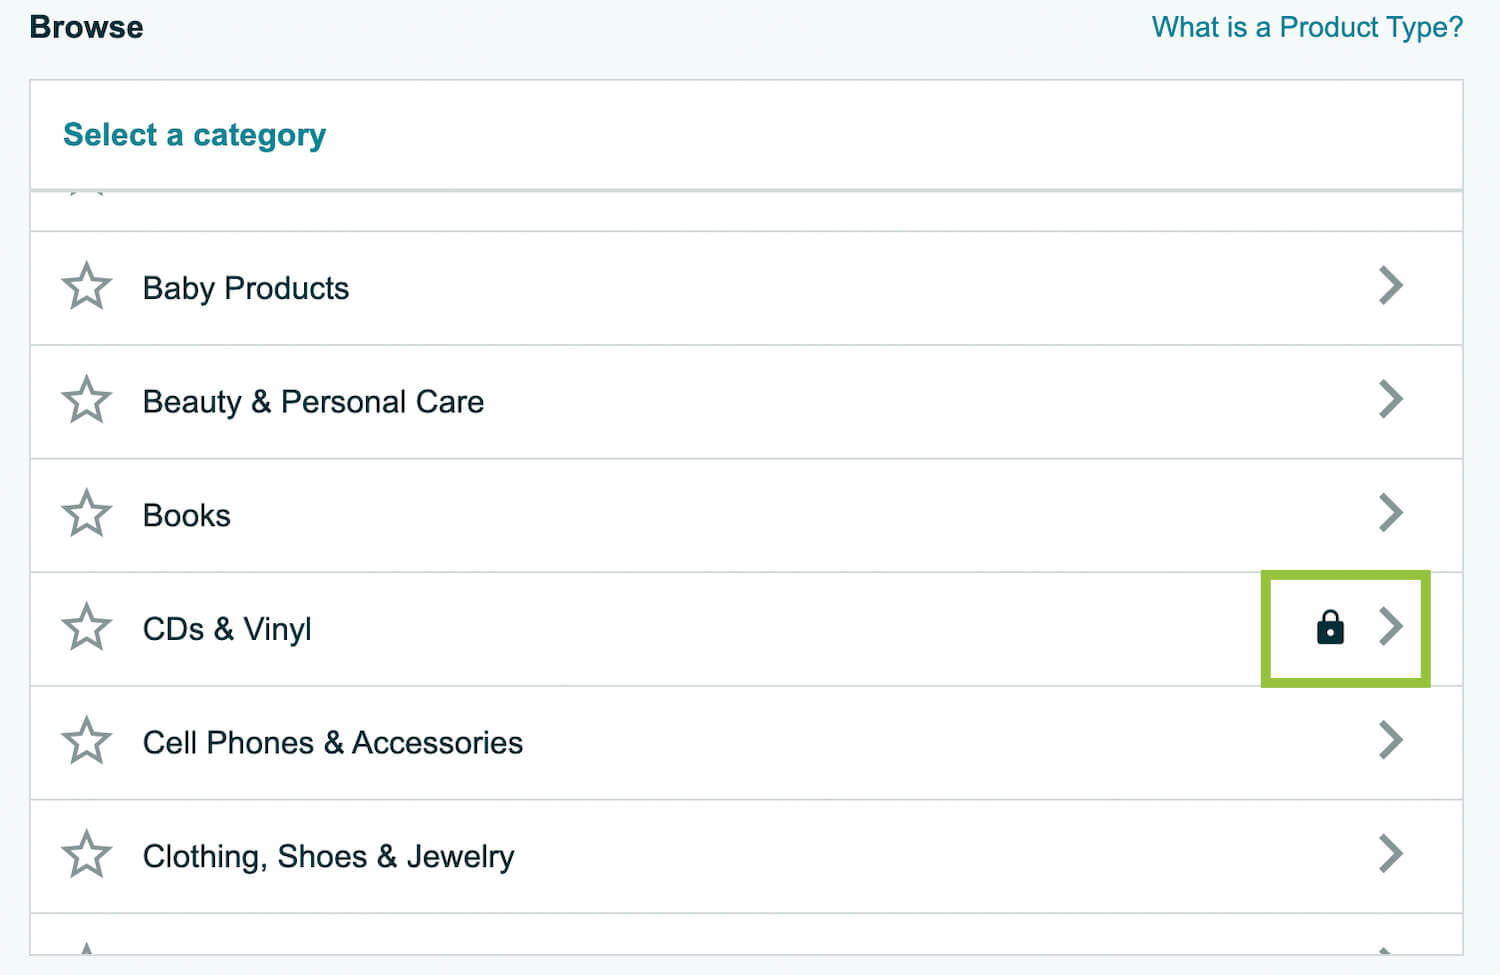
Gated categories are ones you have to apply to sell in. You usually need previous sales history, good standing with Amazon, and meet other criteria in order to get approved. Learn how to get ungated in a certain category in this article.
Product (sub)categories that require certifications to sell and/or contain potentially hazardous products are often gated. However, products with certification requirements do not fall exclusively into gated categories.
The other way to categorize your product is to search your product’s main keyword or identifying term.

If the results include the final category you will list your product in, click Select next to that category.

Selecting your product’s category is a necessary step to list your product for sale. That said, it comes with an added bonus.
2) Prevent product launch delays by identifying certification requests.
When you enroll your future products in FBA, Amazon will automatically run a preliminary check on the product and its prospective certifications. So, the best, biggest, and first way to check if your product might require certifications is to create your Amazon FBA listing.
You should do this well before your products are ready to be shipped to an Amazon fulfillment center, let alone sold to Amazon shoppers.
From your seller central account, click on the three lines in the upper left corner.
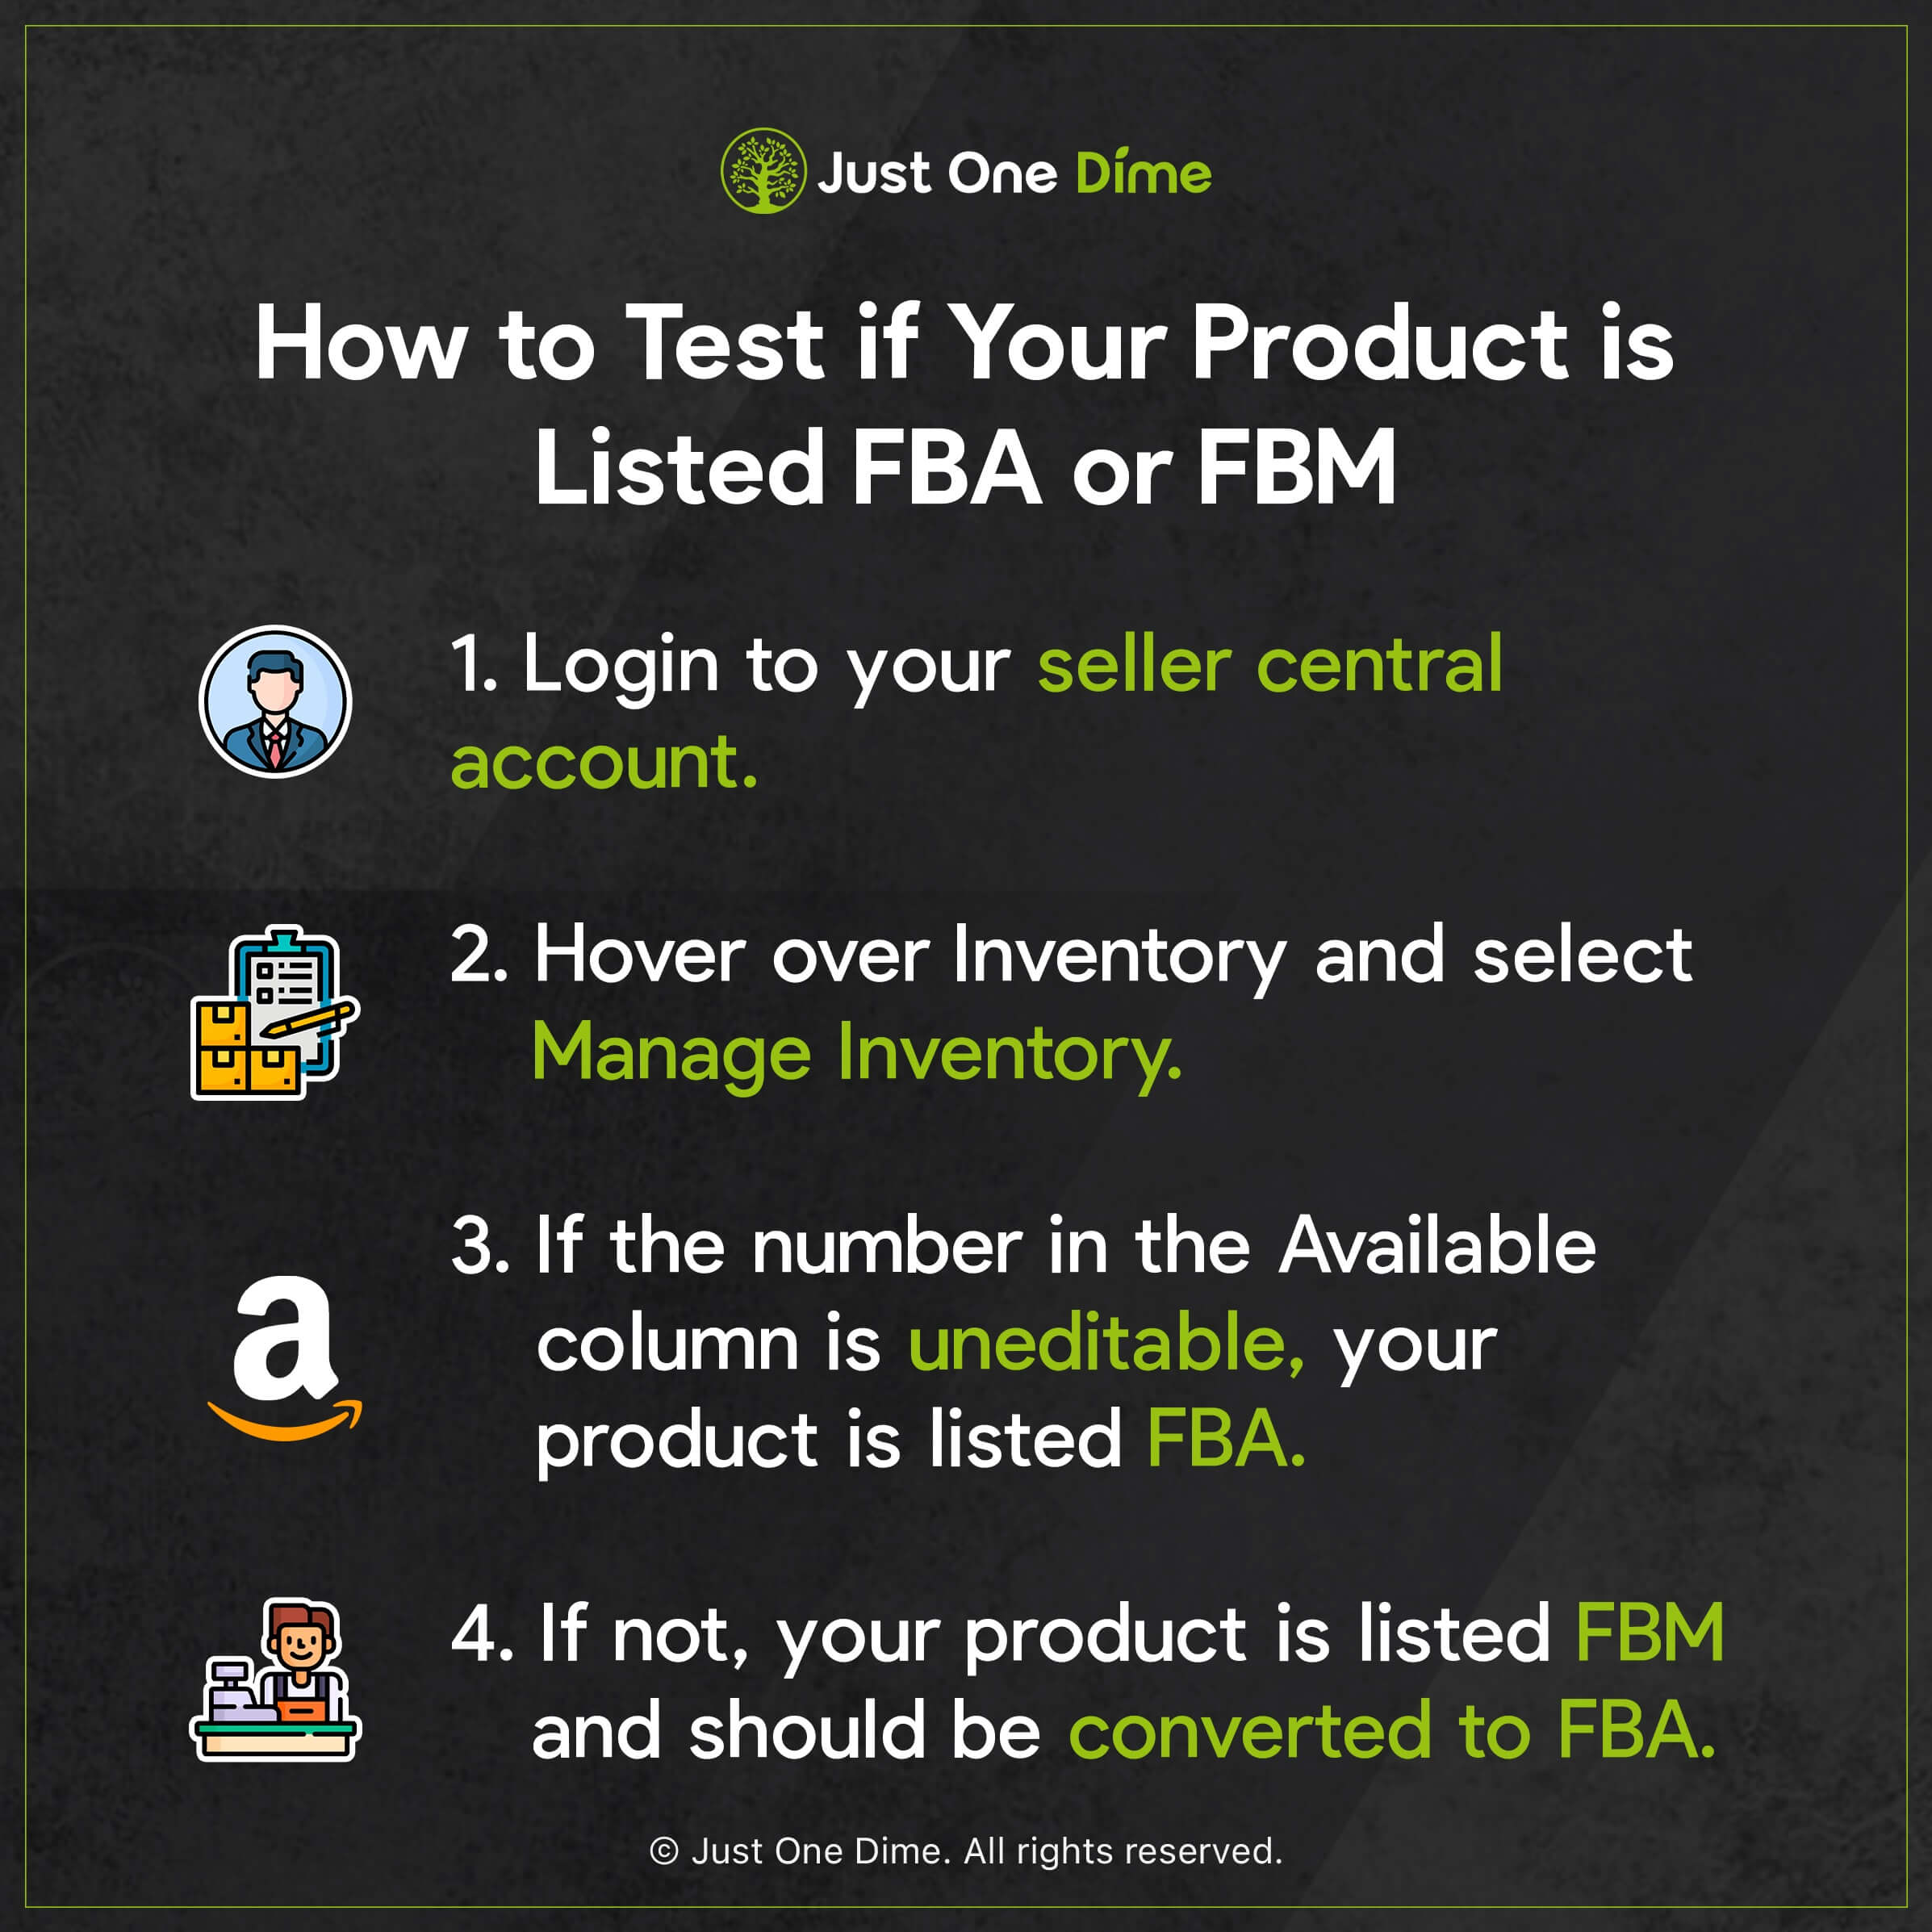
Hover over Inventory and select Manage Inventory.
.jpg)
There, you should see your product listed.

If you can edit the quantity in the Available box, your product is set up for FBM—fulfilled by merchant (we also like to refer to FBM as “fulfilled by me”).

Amazon will forgo certain certification requirements for FBM products. In order to know definitively if your products require certifications, you must convert your listing to FBA, which we show you in our Amazon FBA Mastery membership.
If, instead, there is an unchangeable 0 in that box, your product is set up for FBA 👍.

Once your product is listed as FBA, you should move forward with the next check for certifications: Setting up a shipping plan.
Just like building your listing, you should create a shipping plan in advance, well before your products are actually on the way.
Here’s why:
When you create your shipping plan, that tells Amazon that your products are en route and will soon be in Amazon fulfillment centers, handled by Amazon fulfillment center employees. For that reason, Amazon will run another check to ensure that there are no elements to your product that require special storage and/or handling in order to remain safe.
By creating a shipping plan early (we show you how in this post), you can get a head start on any certifications the shipping plan might trigger for your product.
However, if you wait until your cargo is en route to set up your certifications—extended shipping times aside—you’ll likely hit a delay. Nine times out of ten your products will take far less time to arrive at a fulfillment center than it will take to get any remaining certifications processed.
Finally, there’s one last check you can use:
Amazon recently launched their Compliance Reference Tool, which allows you to predict what certifications your product might require. That way, you can know what you need to have ready and certified in order to launch your product on time. This tool can also help you stay current on any changes in product certifications and requirements over time. We show you how to use it in this article.

Once you’ve got a product category and are aware of any potential certification requirements (and are working towards getting those), you will start to compile keywords so shoppers can find your product.

3) Identify keywords shoppers search to find your product.
Keywords are words or phrases that shoppers use to search for whatever they want to buy on Amazon.com. Think of keywords as matchmakers: they match customers who are searching for your type of product with your product itself.
Keywords can be a single word, like “floatie”, or term such as “dog float”. They can also be an entire phrase such as “pool float for large dogs”.
As you brainstorm your product ideas and research and manufacture your chosen product, you should collect an entire arsenal of keywords that you will strategically place throughout your product listing.
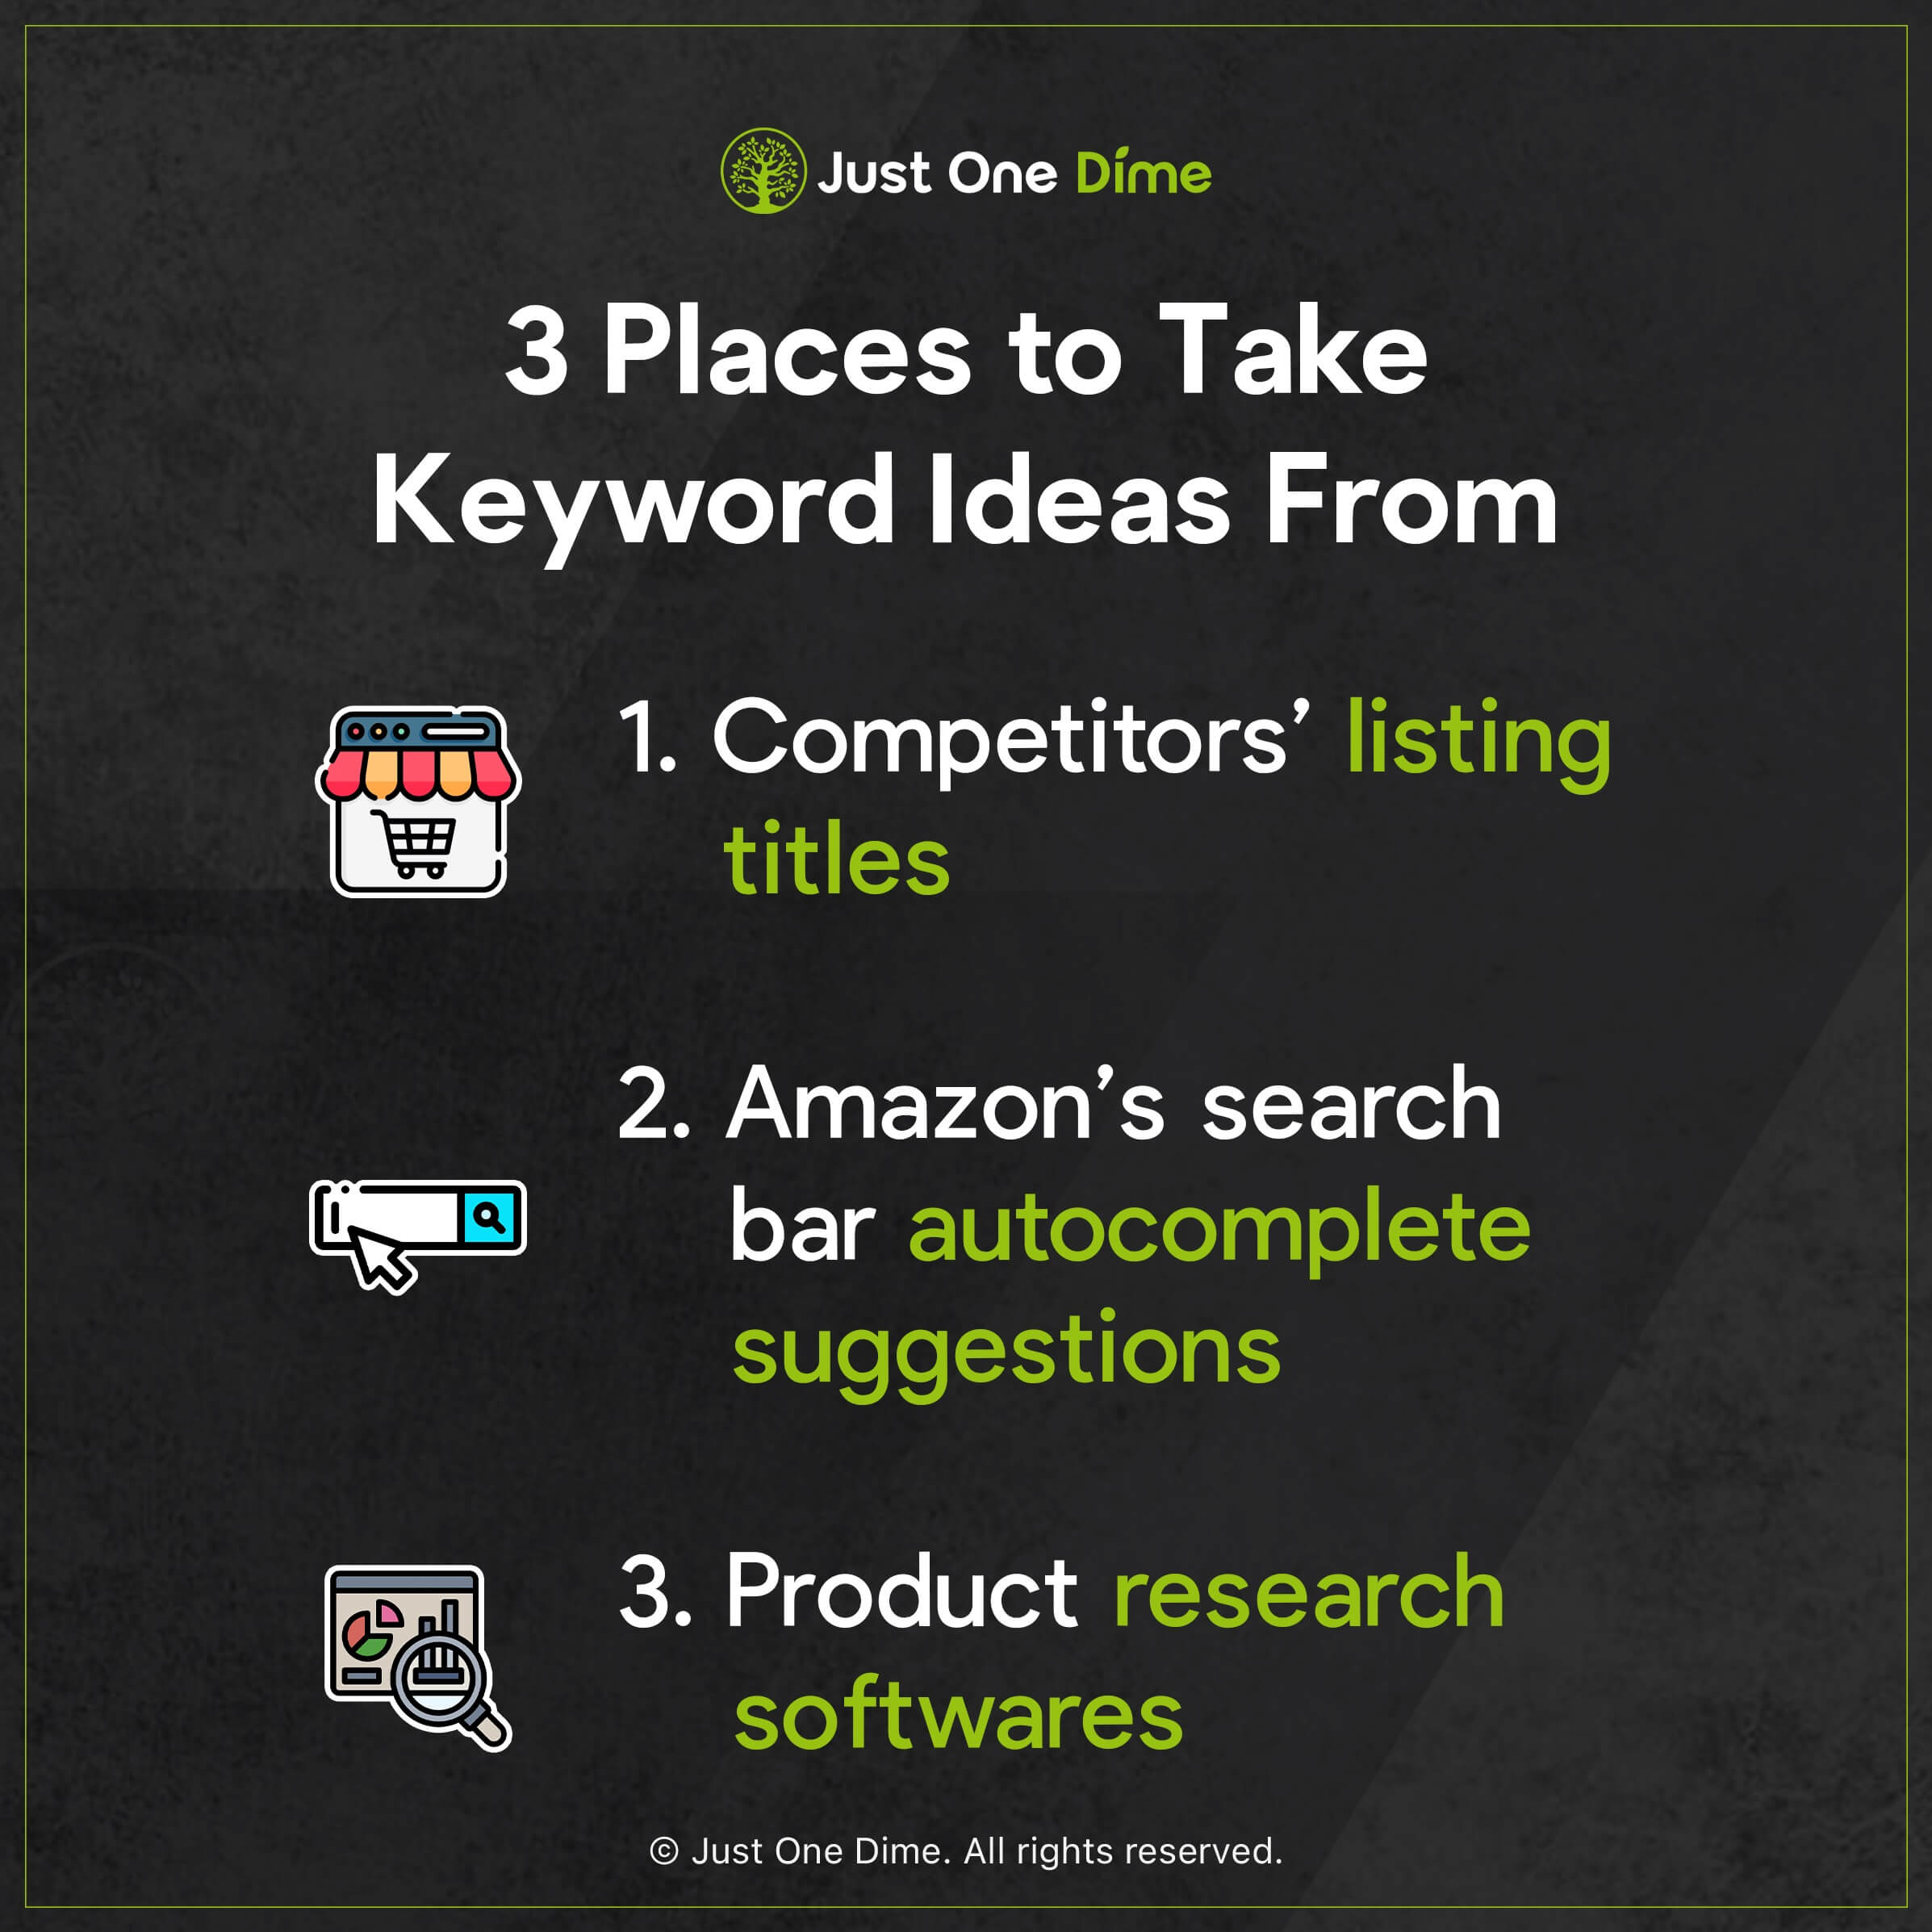
You can easily find relevant keyword ideas for your product in three places:
1. Competitors’ listings (specifically listing titles)
Amazon listing titles are chalk full of keywords relevant to their respective products…or at least they should be. Yours will be if you follow our training.
It stands to reason that you can find a wealth of keywords more or less relevant to your product from your future competitors’ listing titles (along with their listing’s bullet points and description).
2. Autocomplete suggestions in Amazon’s search bar
A search on Amazon is a search to buy. And autocomplete suggestions from Amazon’s search bar are suggestions based on what shoppers have actually searched and are thus looking to buy.
By typing part of your keyword and paying attention to what comes up as a suggested extension, you can find dozens of keyword phrases that shoppers actively want to spend money on. Just be sure when you do this that you only choose keywords relevant to your product, not just any suggested keyword.
For example, if you search your main keyword, “dog float”, you get the following suggestions:
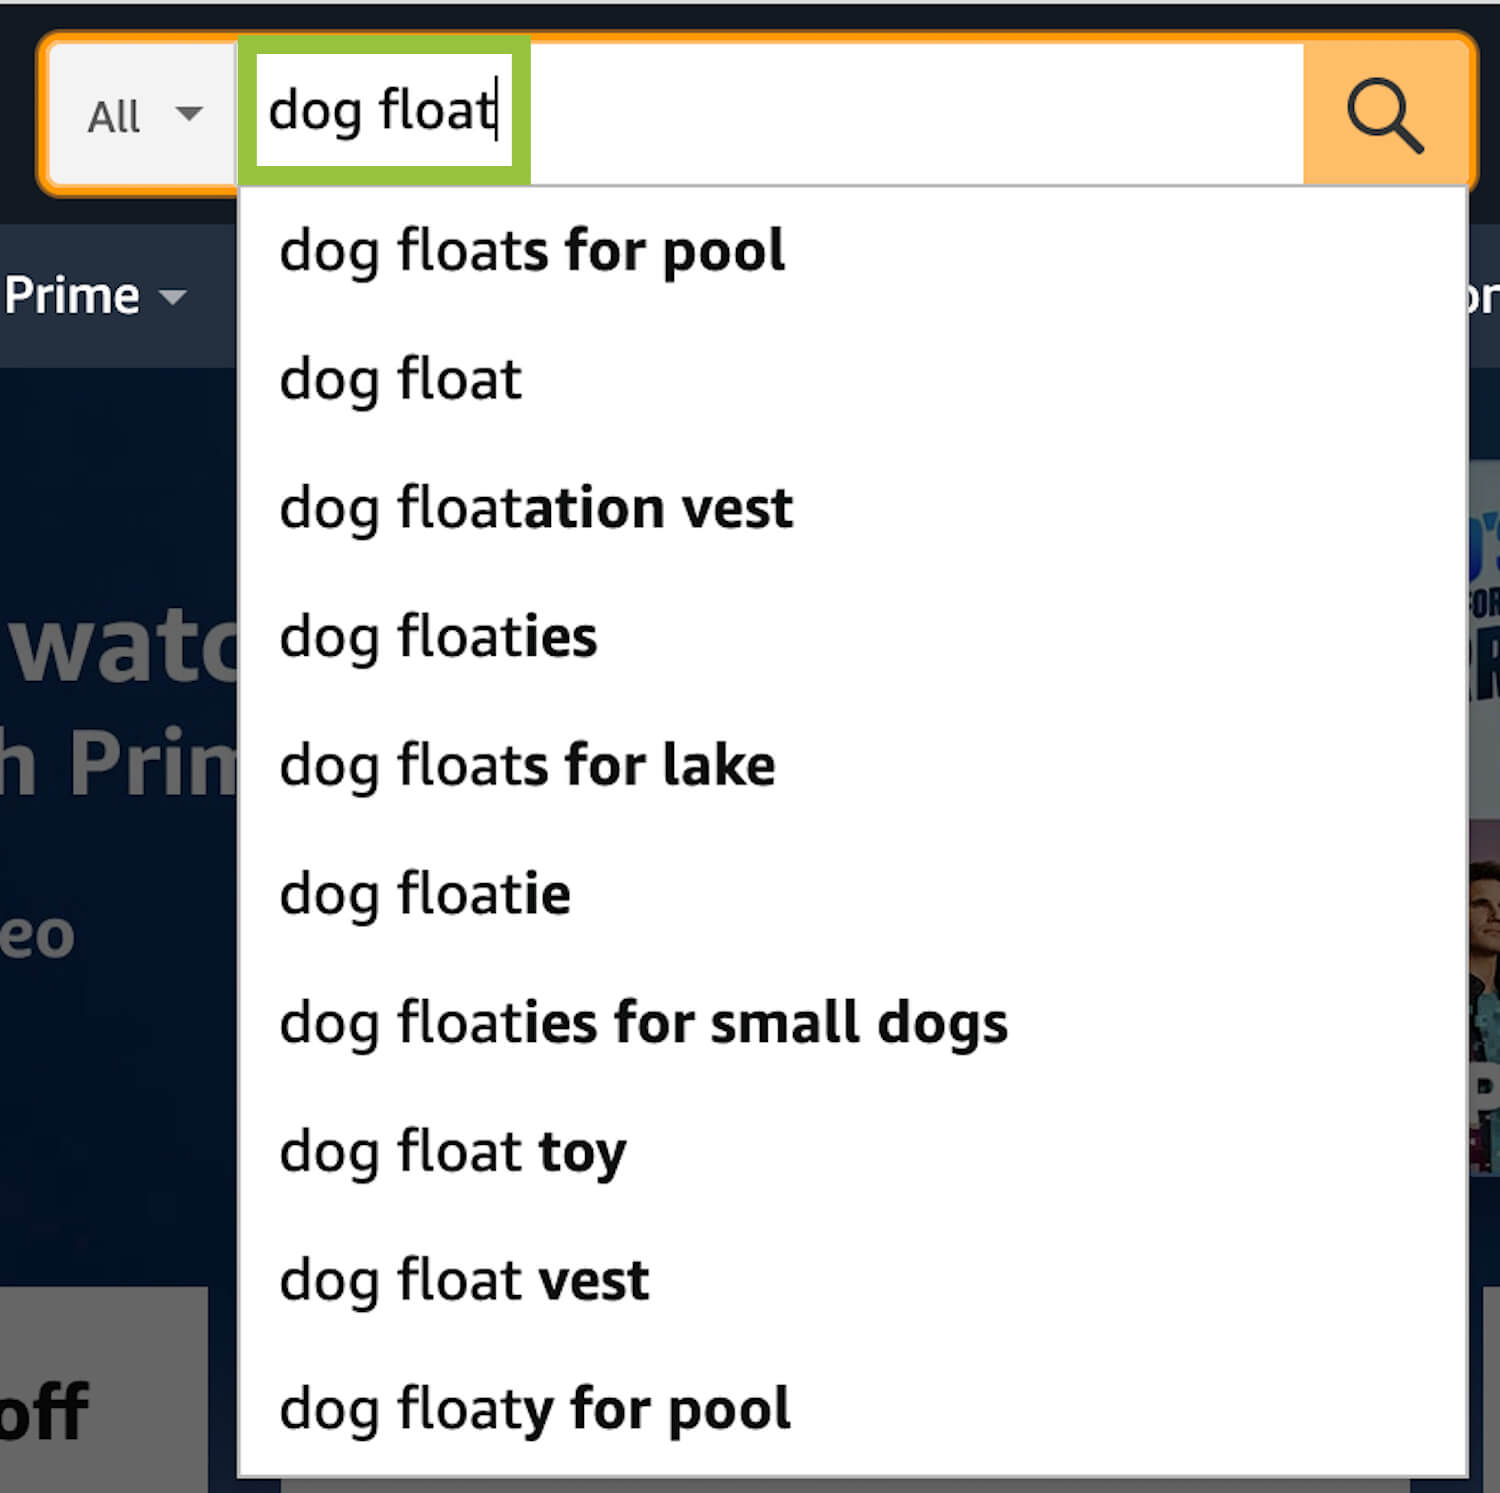
Most of them are relevant to your product.

However, you would not want to add “dog flotation vest” or “dog floatie vest” to your keyword list since your product is not an actual vest.
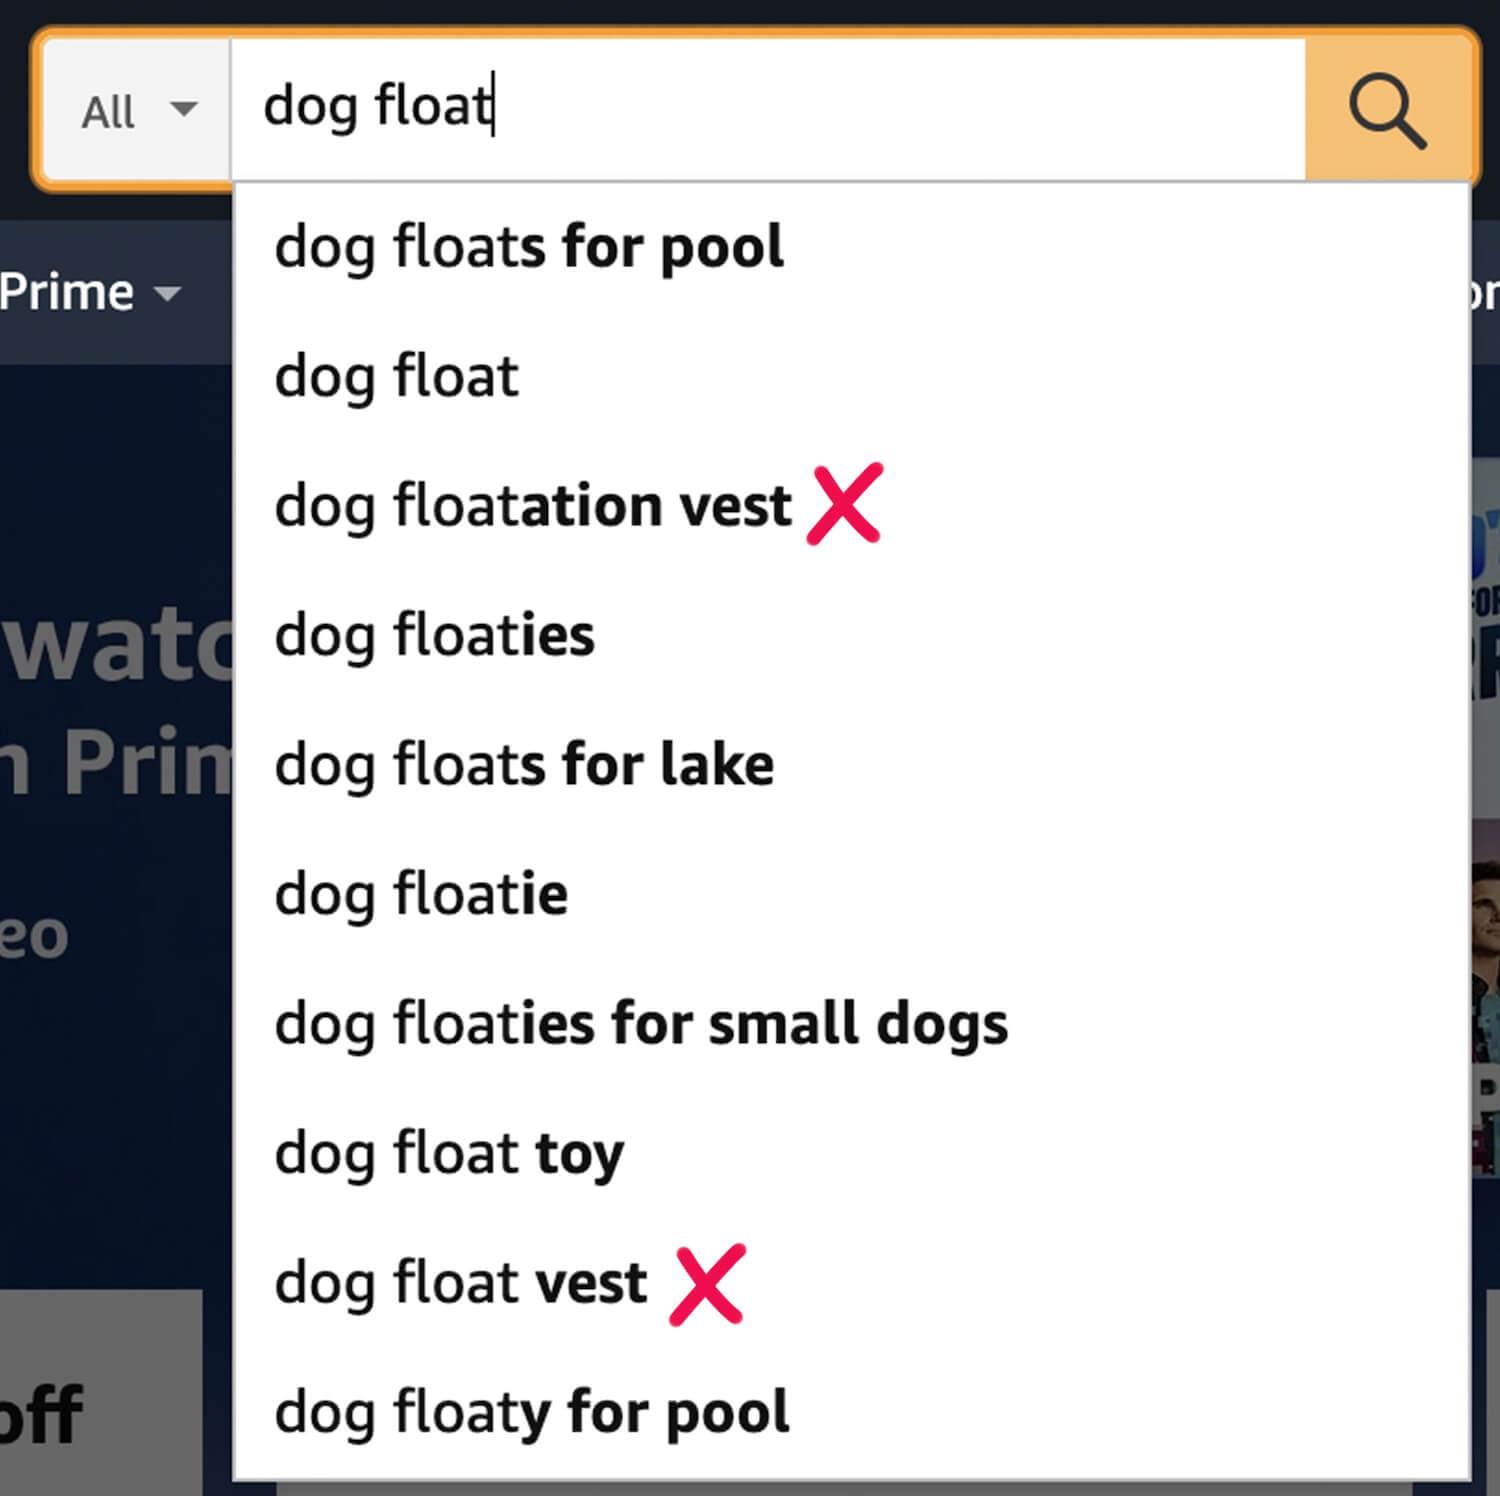
If you were to add “dog flotation vest” to your listing, your product will likely not see strong clicks, let alone sales for that keyword, as a dog pool float will not satisfy the shopping needs for customers who search “dog flotation vest”.
3. Product research software such as Just One Dime’s own Niche Hunter
Most product research softwares include a feature that shows you dozens of related keyword ideas once you’ve searched your product’s main keyword. These softwares are full of invaluable customer data. Much like Amazon search’s autofill suggestions, software keyword suggestions are words and phrases real Amazon shoppers have actually searched.
Once you’ve got a plethora of relevant keywords, rank them from most to least relevant. That order is how you will place them throughout your listing.
4) Write your product listing.
Your product listing contains four main written parts:
- Title
- Bullet points
- Description
- Backend search terms
Once you’ve done your homework and compiled dozens of relevant keywords, this step should be a lot easier.
Your most relevant, most-searched-for keywords belong in your listing title.
After that, the next most relevant keywords go into your listing’s bullet points.
Next up is your listing’s description.
Finally, any leftover keywords—along with common misspellings of your most relevant keywords—go into your backend search terms.
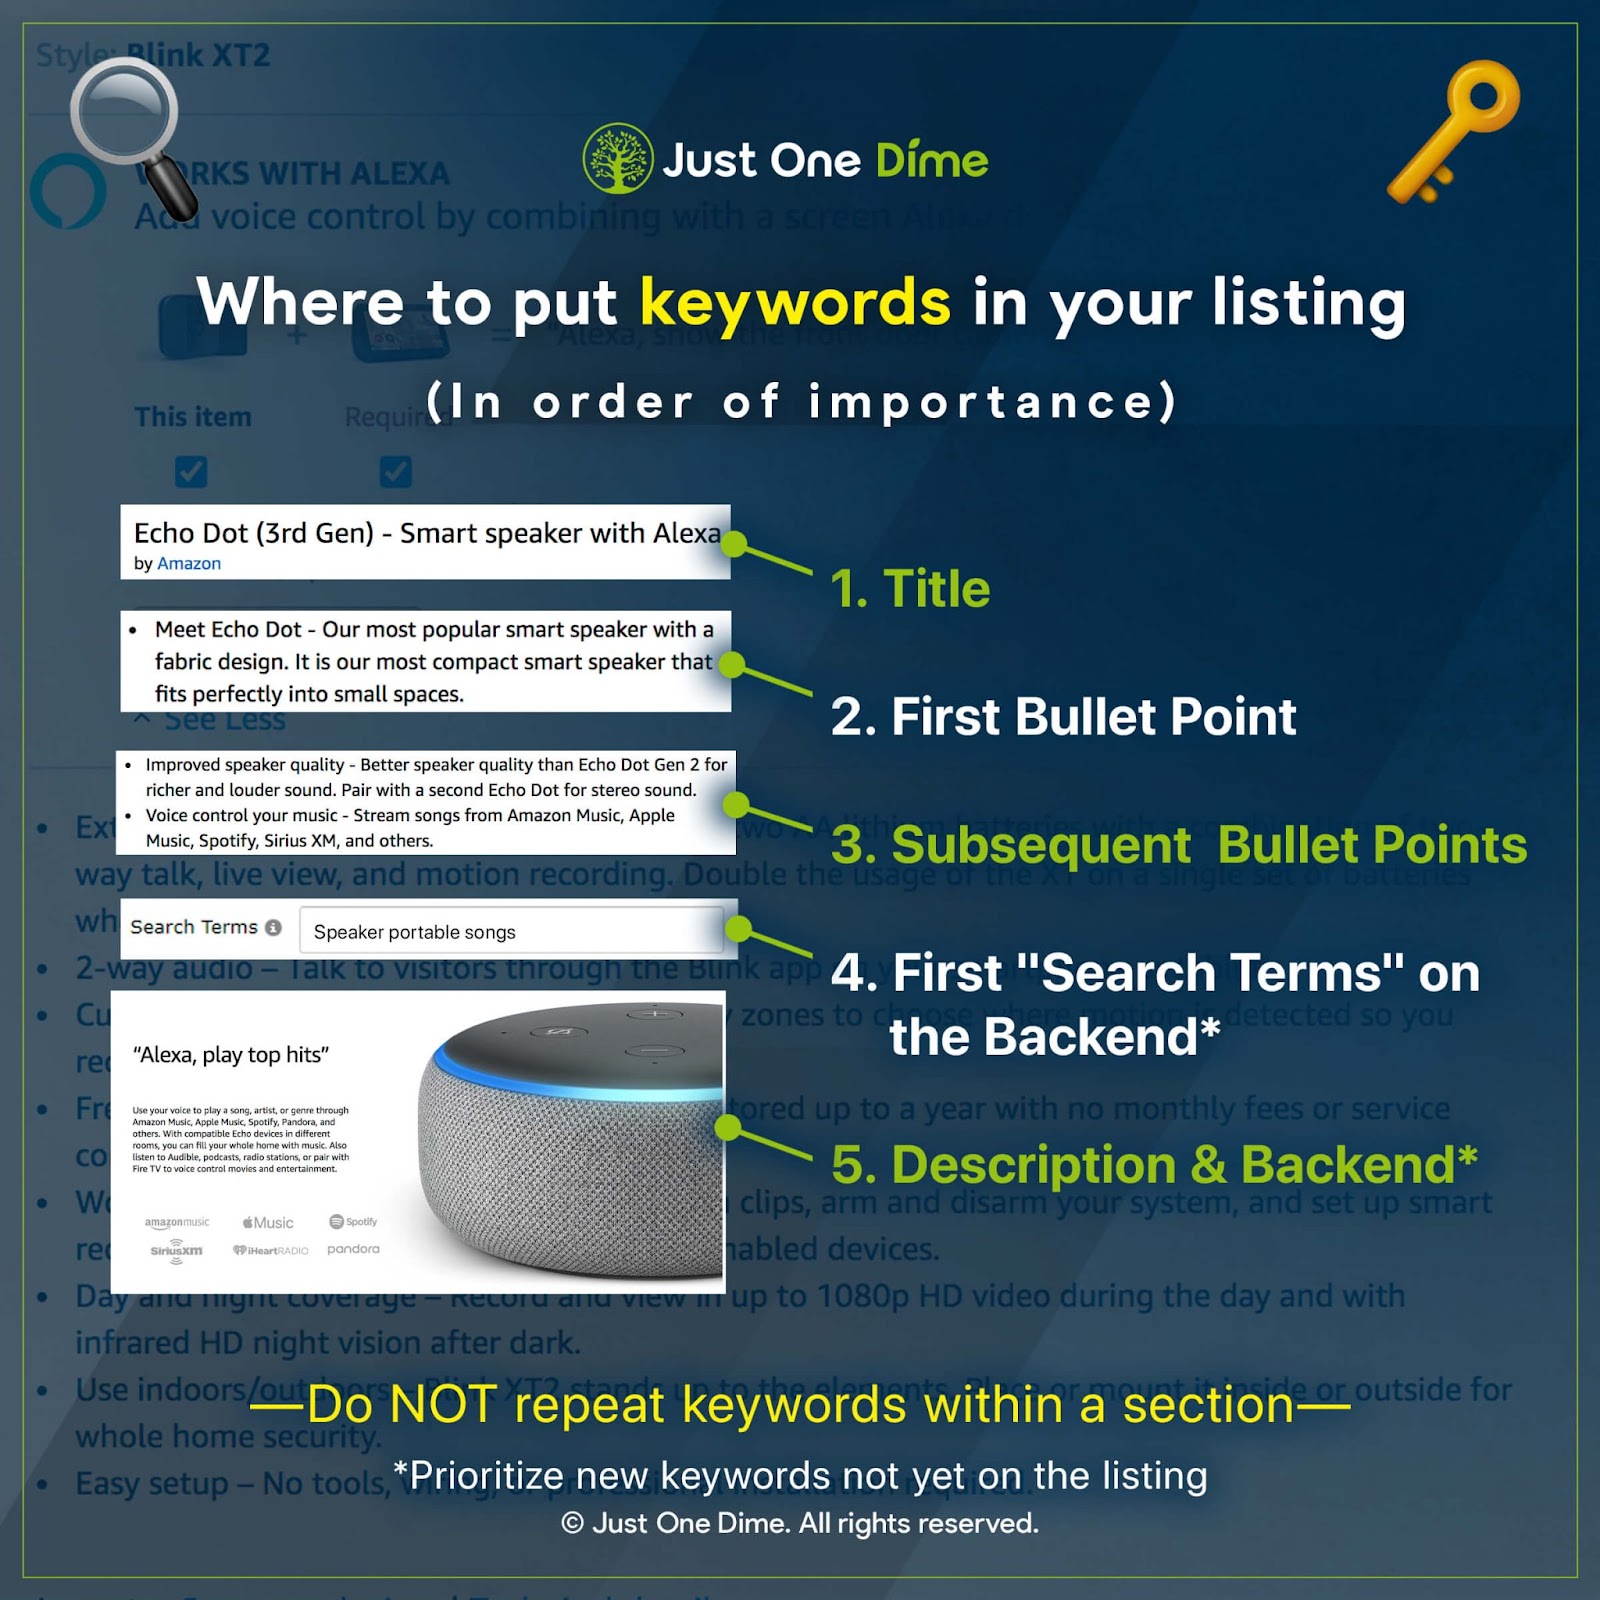
These placements will both help shoppers find your products and allow you to run more effective advertising to boost conversions quickly and early on.
We give you the full run down on incorporating your keywords into each part of your listing, along with what type of product information to include where, in this article.
Visit JOD.com/listing to download your own copy of our free product listing worksheet. It can help you maximize character—keyboard letters, numbers, symbols, and spaces—real estate on your listing to drive conversions. It can also help you best format and order relevant features within your product listing.
Of course, the order in which you include your keywords and how you advertise your product’s features throughout your listing are critical to driving conversions. However, no keyword placement nor written sentence can better do the job of convincing a shopper to buy your product over another like your product photos.
5) Include beautiful product photos.
I’m not being dramatic when I say that product photos can make or break your experience selling on Amazon…or anywhere else, for that matter.
Shoppers, especially online shoppers, buy with their eyes. They have to, particularly since when shopping online, customers cannot pick up your item, feel it, turn it around, etc. It’s on your photos, and your photos alone, to help customers envision your product and how it might function in their lives if they do decide to buy.
Don’t get me wrong: Outfitting your listing with the best keywords is the best way to get your product in front of shoppers who might buy it. But once your listing appears in search results when a shopper searches a relevant keyword, your product photos take over 📸.
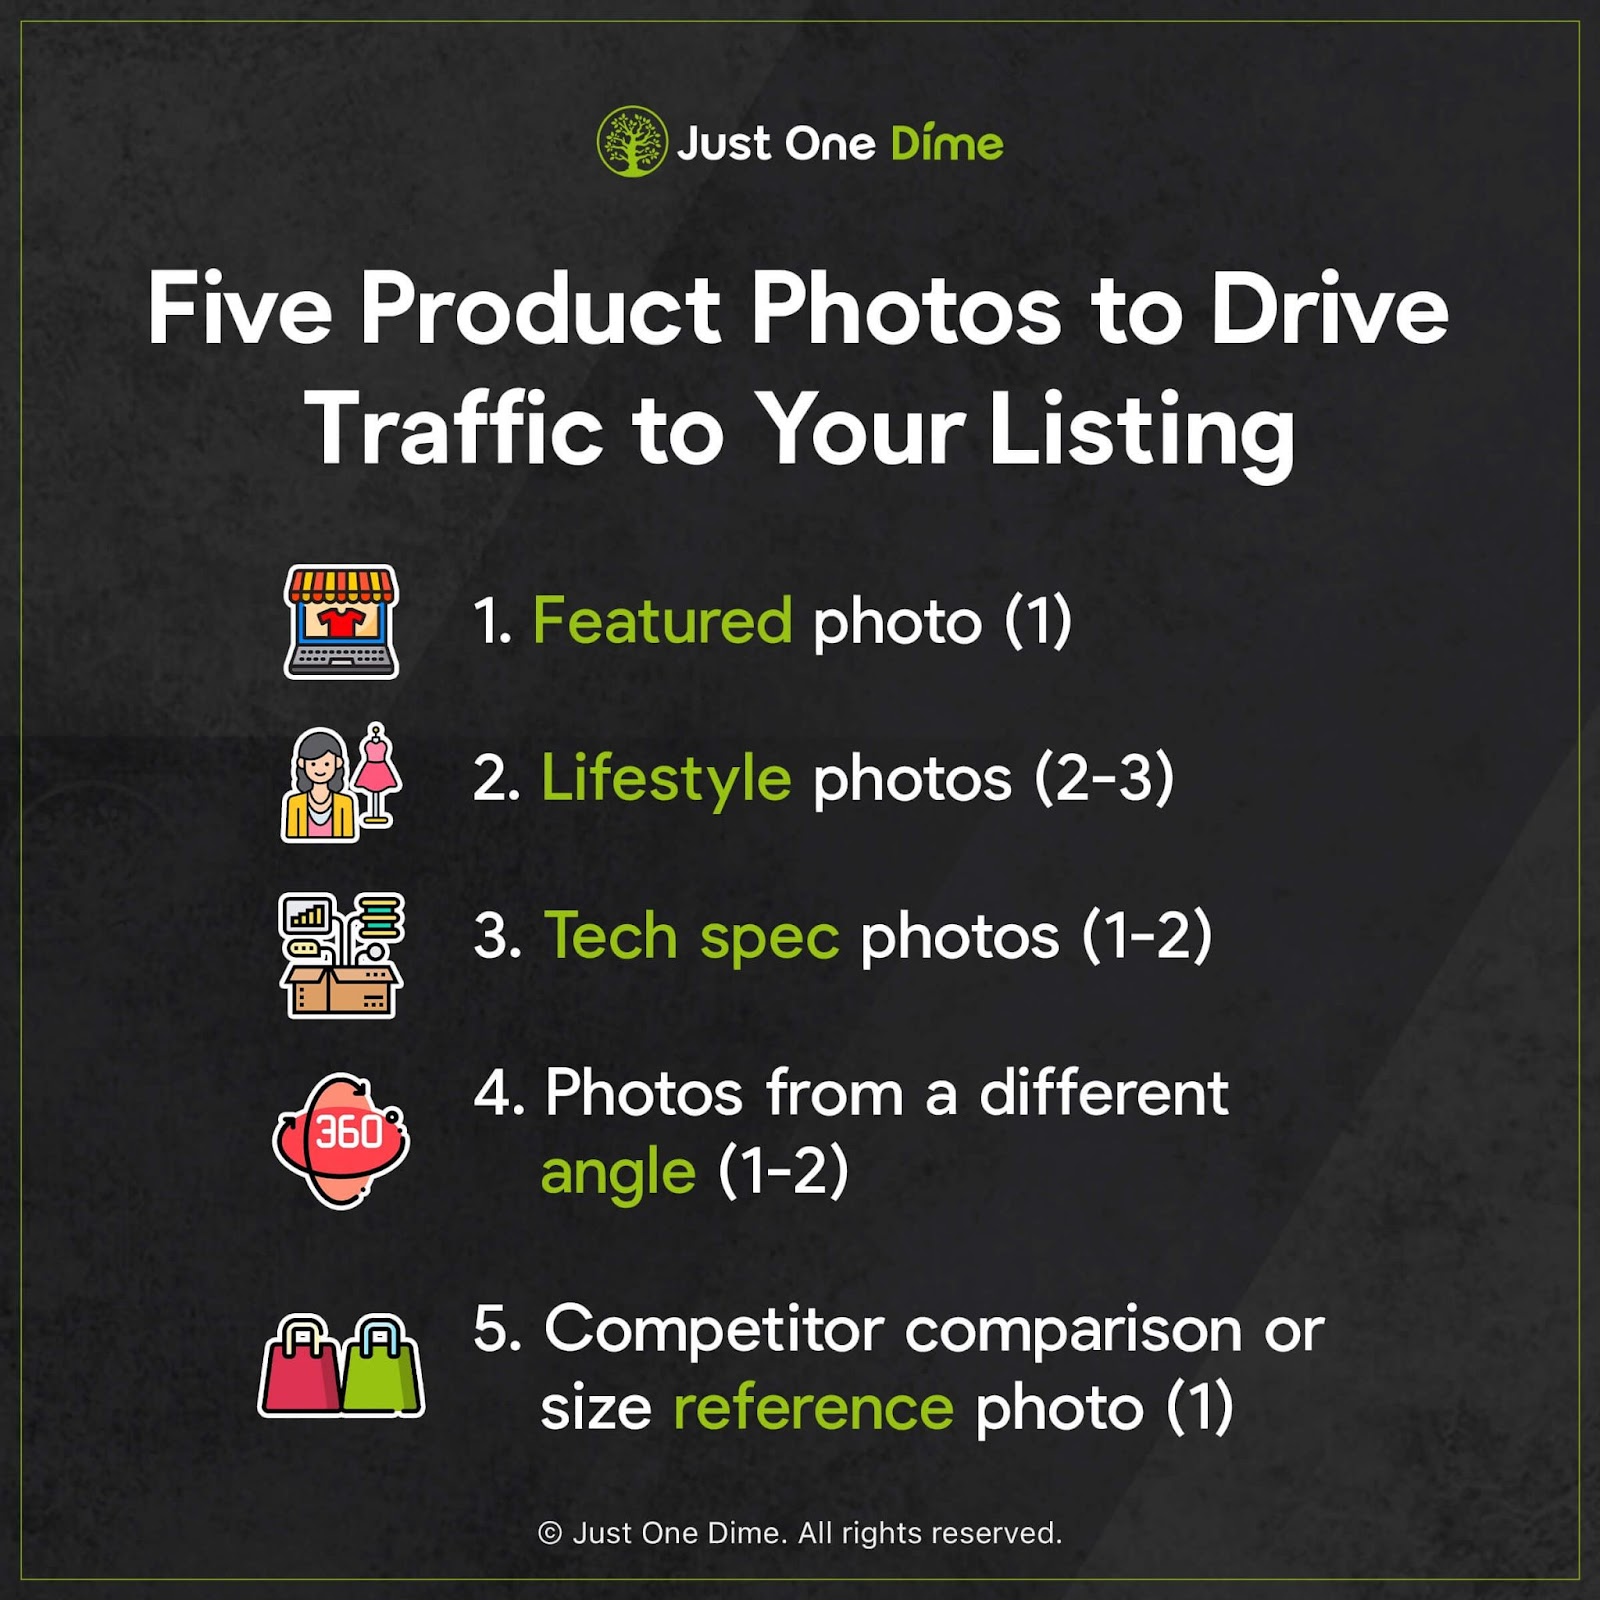
You should outfit your listing with five types of photos:
- Featured photo, the image that appears in search results (1 count)
- Lifestyle photos (2-3 count)
- Tech spec photos (1-2 count)
- Photos from a different angle (1-2 count)
- Competitor comparison or size reference photo (1 count)
Your product photos act as a funnel to get customers from search results to checkout with your product in their carts.
Your main, featured photo captures customers’ attention. This photo also shows customers what problem your product could solve in their lives.
Then, after shoppers have clicked on your listing, the rest of your photos should show the full value that your product offers, thus persuading the shopper to click “Buy Now”. These photos might also show how your product doesn’t just solve problems, but solves them much better than your competitors.
There are lots of nuances that go into creating stunning product photos. If you have a decent smartphone and a general knowledge of photography–and/or you need to save some cash 💰—you can attempt your own photos. However, given the magnitude of importance product photos play in conversions, we recommend you hire a professional photographer to take your listing’s photos if you can afford it.
And if you decide to become a brand registered seller on Amazon and outfit your listing with A+ content, you’ll definitely want professional photographs for all the extra room you’ll have for graphics.
6) Build out A+ Content to boost conversions.
A+ Content is one of the many perks that comes with being a brand registered Amazon seller (although brand registry also comes with access to invaluable customer data, sales analytics, and greater backup and protections from Amazon against hijackers who might piggyback off your listing).
You must apply to become a brand registered Amazon seller, and for that you must have a trademark in hand for your brand. However, you can apply for your trademark through Amazon’s IP Accelerator to become brand registered before your trademark application is approved.
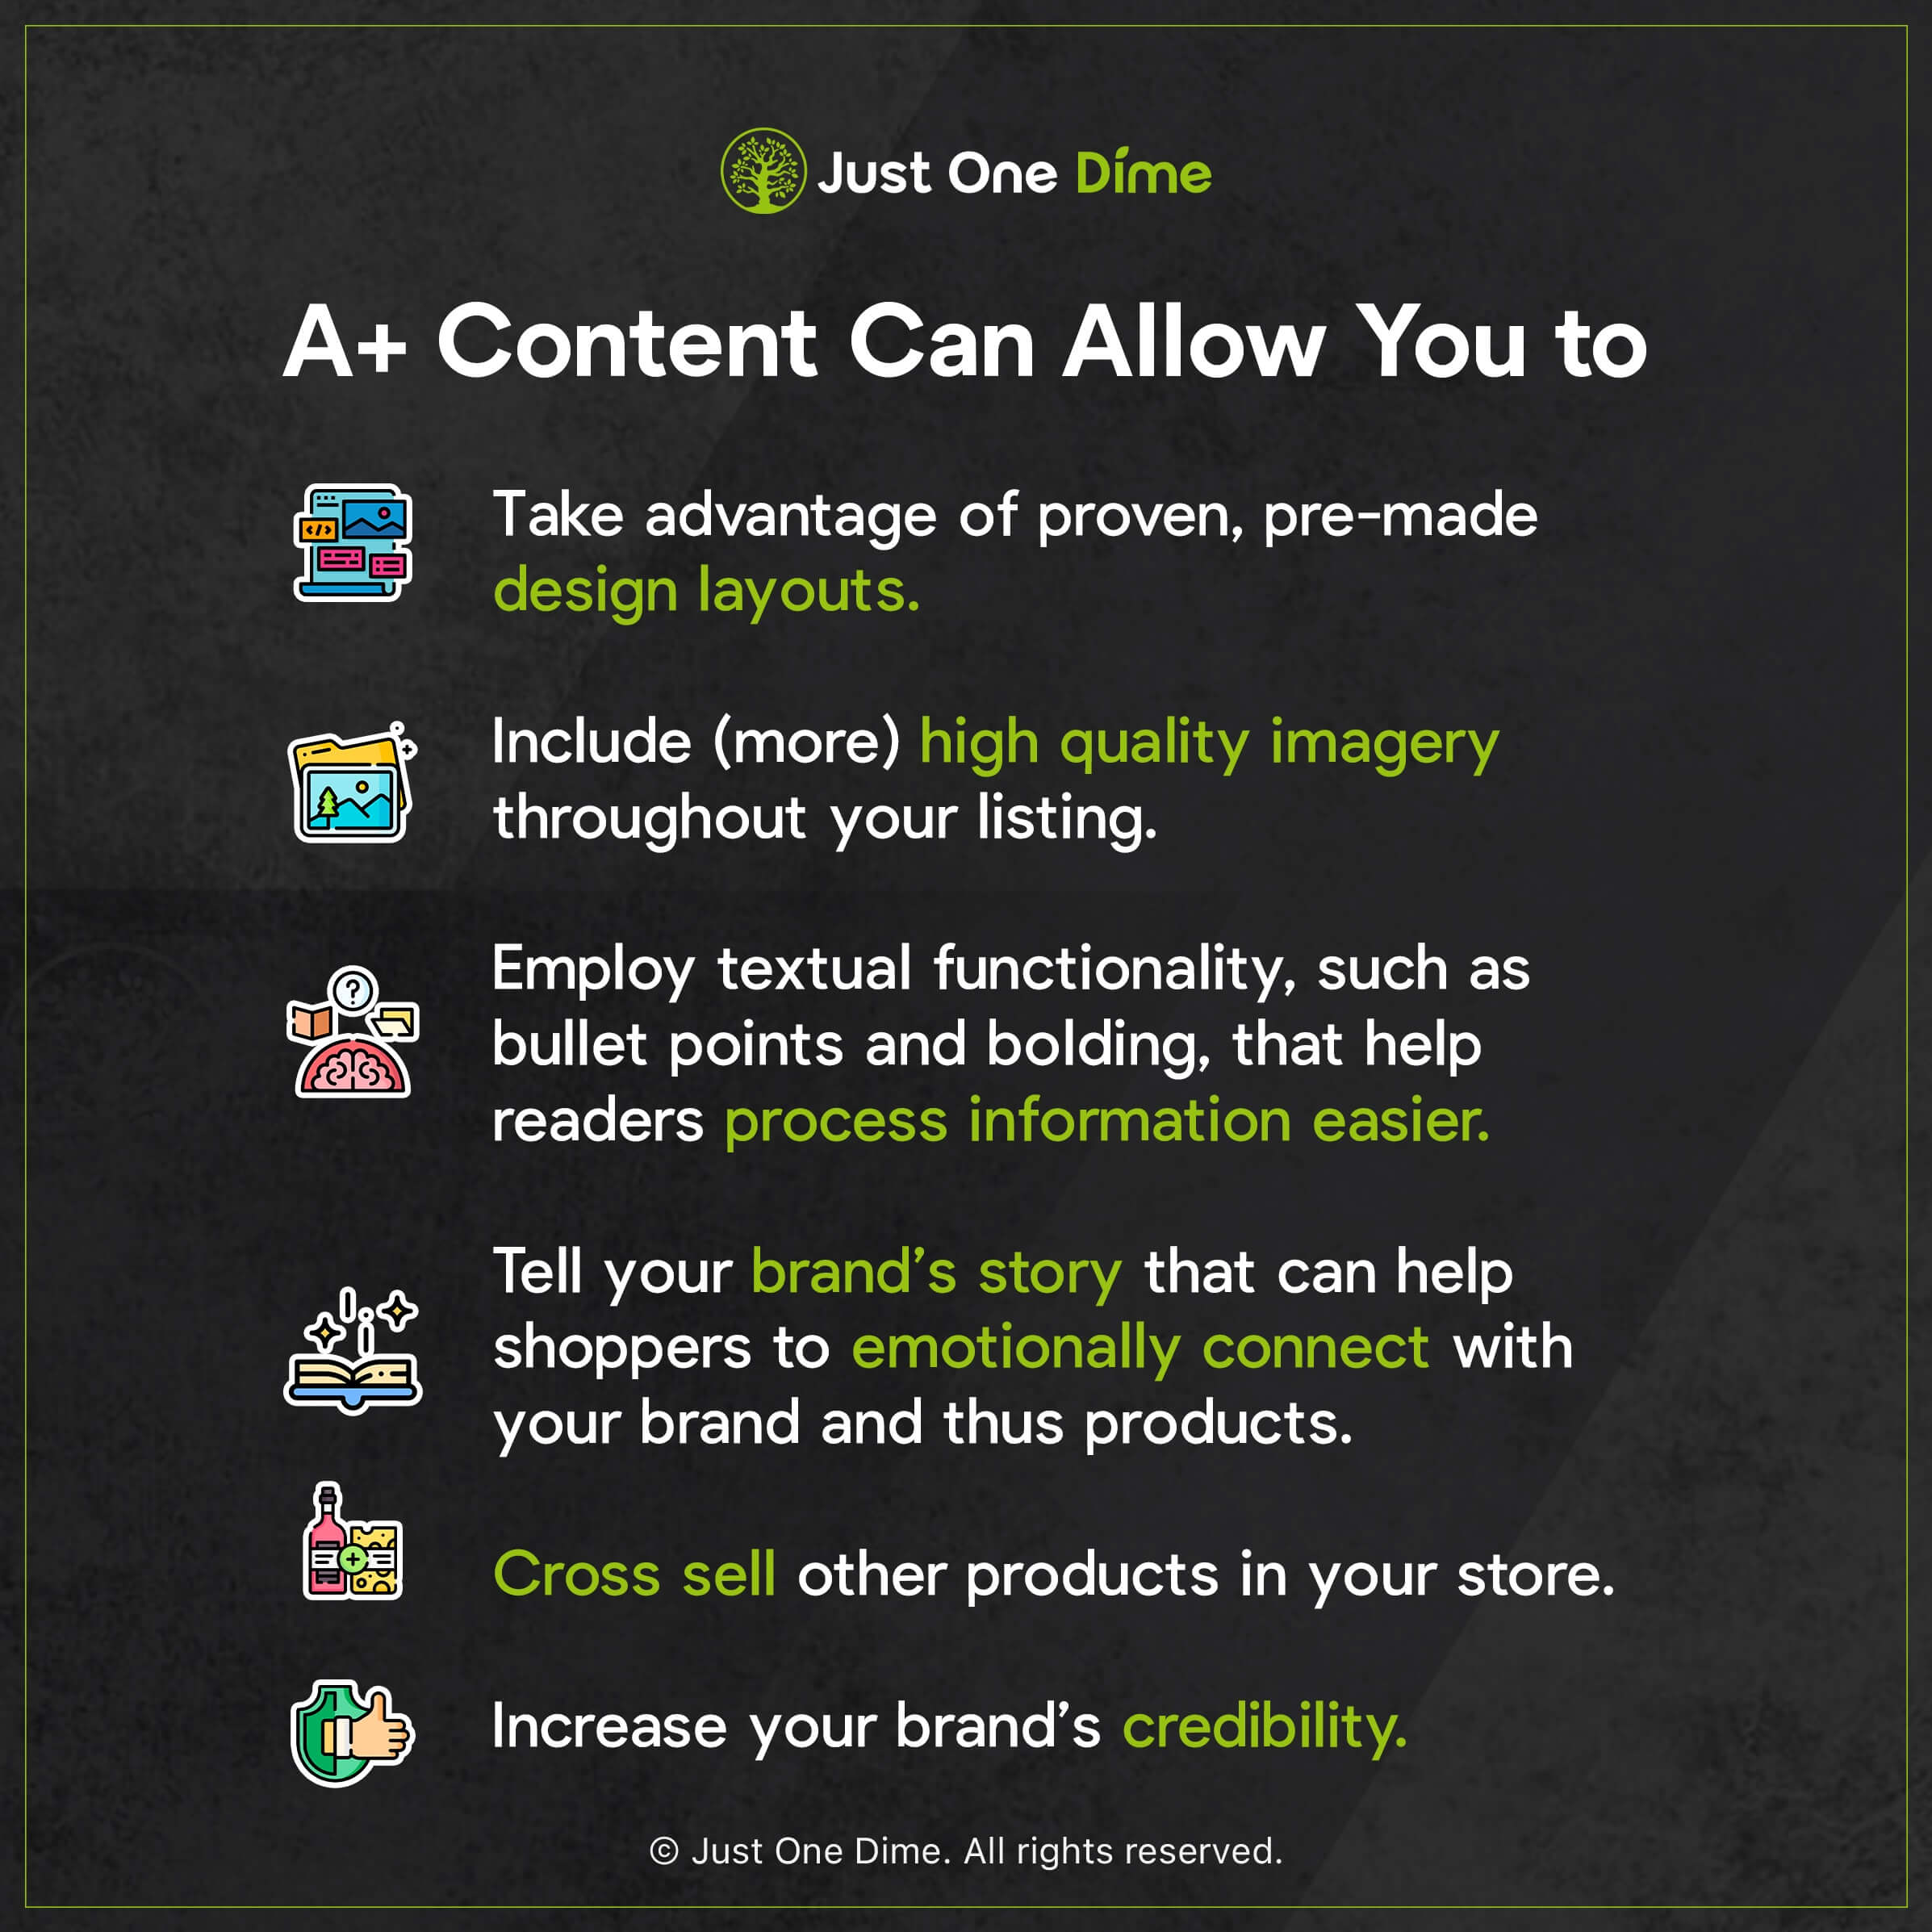
Once you’re approved for brand registry, you can outfit your listing, particularly the description section, with A+ content. A+ content allows you to create a visually-stunning listing full of vibrant, and even textual, graphics. With A+ Content, you can:
- Take advantage of proven, premade design layouts
- Include (more) high quality imagery throughout your listing
- Employ textual functionality, such as bullet points and bolding, that help readers process information easier
- Tell your brand’s story that can help shoppers to emotionally connect with your brand and thus products
- Cross sell other products in your store
- Increase your brand’s credibility
When used wisely, these attributes can help your listing to look more like a page on your very own website and less like a generic Amazon listing.
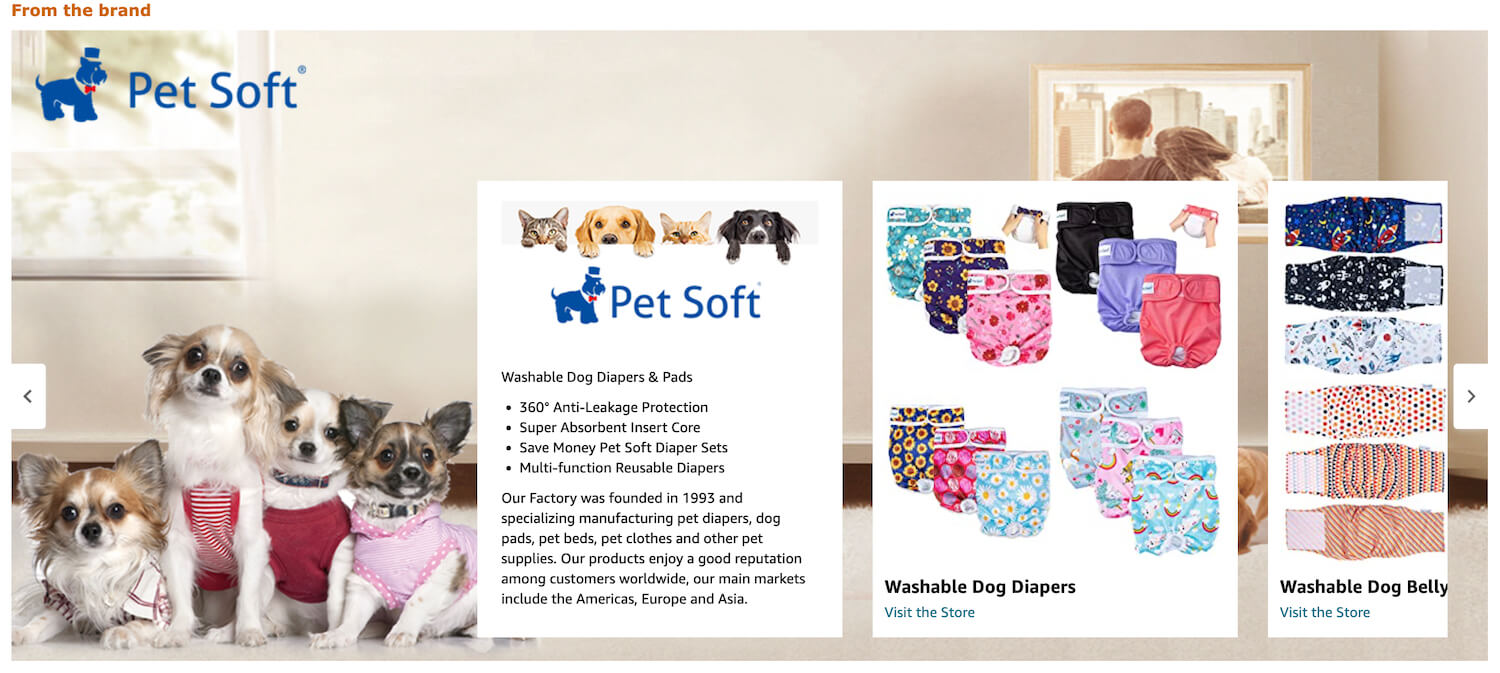
Take a look at this A+ content from pet clothing and pool outfitter Pet Soft:

Notice how instead of a generic product listing and description, we’re getting vibrant images that quickly demonstrate key product features that do the work of several bullet points, combined.
It’s certainly more engaging than this generic, under-utilized product description from a competitor:

Basically, A+ content can help shoppers process the same information you would write into your listing, but in a visual fashion. Much like product photos, the visual nature of A+ content makes the material much easier to process for the human brain 🧠.
With A+ content, you can even add a section on your brand itself so that shoppers can learn its backstory and feel a connection with your company and your mission, all of which leads to greater conversions quickly.
It's a powerful tool for your product listing and brand!
Get in-depth instructions on how to set up and build out spectacular A+ content—along with how to find product ideas and bring them to life, write your listing’s copy, run advertising, and expand your brand outside of Amazon—in our Amazon FBA Mastery membership.
Don’t forget to grab your copy of our product listing optimization worksheet below. It can help you set your listing up for maximum success with strong copy, great pictures, and more.
What part of building an Amazon product listing is most challenging for you? Let me know in the comments.
